Understand Your Home’s Climate to Support Healthier Plants Year-Round
Indoor plants bring life and tranquility to our homes, yet many struggle silently when heating systems alter the air’s moisture balance. This guide clarifies how humidity and heating interact with plant biology, debunks common misconceptions, and offers a practical, adaptable framework for creating supportive microclimates—using observation, accessible tools, and thoughtful adjustments. Move beyond guesswork with strategies grounded in horticultural principles and tailored to real-world living.
Introduction
During colder months, many plant caretakers notice subtle shifts: delicate leaf edges turning brown on a calathea, a peace lily wilting despite moist soil, or a fiddle leaf fig shedding leaves near a heat source. These are not signs of failure but physiological responses to environmental conditions that diverge from a plant’s native adaptations. Heating systems—essential for human comfort—raise air temperature, which increases its capacity to hold moisture, thereby lowering relative humidity. This shift directly affects plant function: stomata (microscopic leaf pores) may close to conserve water, inadvertently limiting carbon dioxide intake and slowing growth. Over time, chronic low humidity can manifest as tip browning, slowed development, or heightened vulnerability to pests like spider mites. Conversely, sustained high humidity without adequate airflow may encourage fungal issues or soil-dwelling pests.
This disconnect often stems from treating humidity and heating as separate concerns rather than interconnected elements of your home’s climate system. Research in environmental horticulture indicates that many tropical species show stress responses when relative humidity remains consistently below 40%, while levels above 70% without airflow can create favorable conditions for pathogens. The solution lies not in pursuing a single “ideal” number, but in understanding the dynamic relationship between your plants’ evolutionary needs, your home’s unique architecture and climate patterns, and your daily routines. Whether you nurture one resilient snake plant or a diverse collection spanning multiple biomes, this guide empowers you to observe, adapt, and support plant health with confidence—season after season.
The Climate Triad Framework: Aligning Plant Needs, Home Environment, and Human Habits
Sustainable plant care emerges from balancing three interconnected elements: your plants’ biological requirements (Plant Profile), the measurable conditions within your living space (Home Climate), and your practical lifestyle constraints (Human Context). Most advice falters by addressing only one element—watering schedules that ignore humidity-driven soil evaporation, generic humidity targets that overlook heating system impacts, or placement choices that disregard daily human activity. The Climate Triad Framework offers a cyclical, observational process to diagnose, adjust, and monitor your indoor ecosystem holistically.
This approach moves beyond rigid directives like “maintain 60% humidity.” Instead, it guides you to categorize plants by native habitat cues, map microclimates with simple tools, and implement layered solutions that fit your life. By recognizing your home as a mosaic of micro-environments—each with distinct temperature, humidity, light, and airflow characteristics—you gain precision without complexity. The following steps build your personalized strategy, designed to address root causes behind common challenges documented across plant communities and horticultural resources.
Step 1: Decode Your Plant’s Native Language (The Plant Profile)
Before adjusting thermostats or purchasing tools, understand what your plants are physiologically adapted to. Plant morphology—leaf shape, thickness, texture, and growth habit—reflects evolutionary history. Misinterpreting these signals leads to well-intentioned but mismatched care. A cactus and a maidenhair fern placed side-by-side will react oppositely to identical humidity levels. Grouping plants by shared environmental needs (zonation) is among the most effective strategies for efficient, successful care.
Why this step matters: Plant physiology is shaped by adaptation. Stomatal density, cuticle thickness, and root structure evolved over millennia to suit specific conditions. Ignoring these traits invites chronic stress. For instance, plants with thin, broad leaves (ferns, calatheas) transpire moisture rapidly and lack significant water storage, making them sensitive to dry air. Plants with thick, waxy, or succulent leaves (ZZ plants, jade) conserve water efficiently; excessive humidity without airflow may hinder their function. Understanding these traits transforms care from reactive to intentional.
How to build your Plant Profile:
1. Identify key adaptive traits: Research each species’ native habitat. Focus on three practical factors:
– Humidity preference range: Categorize as Low (20–40%), Moderate (40–60%), or High (60%+). Note if seasonal shifts occur naturally (e.g., monsoon/dry cycles).
– Temperature stability: Does it prefer consistent warmth (e.g., tropical understory plants) or tolerate fluctuations (e.g., certain desert-adapted species)? Note minimum safe temperatures.
– Light-humidity relationship: Bright light increases transpiration. Plants needing bright light often benefit from higher humidity to offset moisture loss. Low-light plants typically have lower humidity demands.
*Illustrative Example:* *Calathea orbifolia* originates from shaded, humid South American forest understories. Its large, thin leaves maximize light capture but also increase water loss surface area. It generally thrives with higher humidity (60–80%), stable warmth (65–80°F / 18–27°C), and protection from drafts or radiant heat. Conversely, *Zamioculcas zamiifolia* (ZZ plant) evolved in seasonally dry East African grasslands. Its thick, waxy leaflets and water-storing rhizomes allow adaptation to lower humidity (30–50%), wider temperature ranges (55–85°F / 13–29°C), and irregular watering. Placing these together near a heat source often stresses the calathea while risking overwatering the ZZ plant.
- Create a living reference: Organize plants in a simple table updated as your collection grows. This becomes your care compass.
| Plant Name (Common) | Native Context & Key Trait | Humidity Range | Temp Range | Light Synergy | Common Stress Signal |
|---|---|---|---|---|---|
| Maidenhair Fern | Stream banks; thin leaves, high transpiration | 60–80%+ | 60–75°F (15–24°C) | Medium indirect; humidity offsets light exposure | Brown, crispy leaf edges within hours of dry air |
| Snake Plant | Savanna; thick leaves, water-conserving | 30–50% | 55–85°F (13–29°C) | Adaptable low to bright indirect | Root issues if kept overly moist in low light + high humidity |
| Peace Lily | Forest floor; sensitive stomatal response | 50–70% | 65–80°F (18–27°C) | Low to medium indirect; wilts as moisture cue | Brown leaf tips, reduced flowering below 40% humidity |
| String of Pearls | Arid regions; modified water-storing leaves | 20–40% | 60–80°F (15–27°C) | Bright indirect; requires dry air | Pearls shrivel (underwater) or soften/mold (overwater + humidity) |
| Monstera Deliciosa | Tropical forests; aerial roots absorb moisture | 60–80% | 65–85°F (18–29°C) | Bright indirect; humidity supports leaf development | Slow growth, minimal fenestration, brown margins in dry air |
| Cast Iron Plant | Forest understory; thick protective cuticle | 40–60% | 45–85°F (7–29°C) | Very low light; highly resilient | Rarely shows stress; exceptionally tolerant of variable conditions |
- Group strategically: Place plants with overlapping needs near each other. As plants transpire, they collectively elevate humidity in their immediate vicinity—a natural “community effect.” Position humidity-loving plants together on a pebble tray. Situate drought-adapted species (succulents, cacti, ZZ plants) in naturally drier zones like sunlit shelves away from moisture sources. This targeted approach is far more efficient than humidifying an entire room for one sensitive plant.
Common pitfalls to avoid:
– Assuming visual similarity equals similar needs: A standard pothos tolerates moderate humidity (40–60%), while the closely related Satin Pothos often shows stress below 50%. Scientific names aid precise research.
– Overlooking seasonal cycles: Some plants, like cyclamen, enter dormancy requiring cooler temperatures and reduced moisture. Forcing constant warmth and humidity during dormancy may cause decline.
– Ignoring pot and soil context: A plant in a small terracotta pot with fast-draining mix in a dry room experiences amplified moisture stress. The same plant in a plastic pot with moisture-retentive soil in high humidity risks root issues. Your profile should reflect your specific setup.
– Misinterpreting symptoms: Brown tips may indicate low humidity, water chemistry sensitivity (e.g., fluoride in tap water for spider plants), or salt buildup from fertilizer. Correlate symptoms with recent care actions and environmental readings.
Illustrative application: A plant caretaker noticed persistent browning on a Boston fern despite daily misting and a nearby humidifier. After profiling the plant and auditing placement, they discovered the fern sat directly in the airflow path of a heating vent. The humidifier added moisture, but the constant dry air blast evaporated it instantly from leaf surfaces. Relocating the fern group (including a prayer plant) to a bathroom with a north-facing window—paired with a pebble tray and discontinued misting—led to new vibrant growth within weeks. The cactus previously languishing in the humid bathroom thrived on a sunnier, drier living room shelf. The solution wasn’t more humidity, but eliminating the desiccating airflow and creating a stable microclimate.
Step 2: Map Your Home’s Microclimates (The Home Climate Audit)
Your home is not a single climate zone. Temperature and humidity can vary significantly—even within the same room—due to heating systems, window placement, sunlight exposure, architecture, and daily activities. Heating systems are primary influencers: forced-air units circulate dry warmth; radiators create intense localized heat; baseboard heaters generate horizontal dry bands. Conducting a simple, data-informed audit reveals the actual conditions where your plants reside, enabling precise, proactive placement.
Why auditing transforms care: Placing a humidity-sensitive plant in a documented dry zone guarantees ongoing stress, regardless of watering diligence. Conversely, situating a drought-adapted succulent in a perpetually damp bathroom invites issues. Mapping empowers strategic placement—the most sustainable intervention available. It also prevents unnecessary resource use; you avoid running humidifiers where conditions are already suitable.
How to conduct a practical Home Climate Audit:
1. Gather minimal tools:
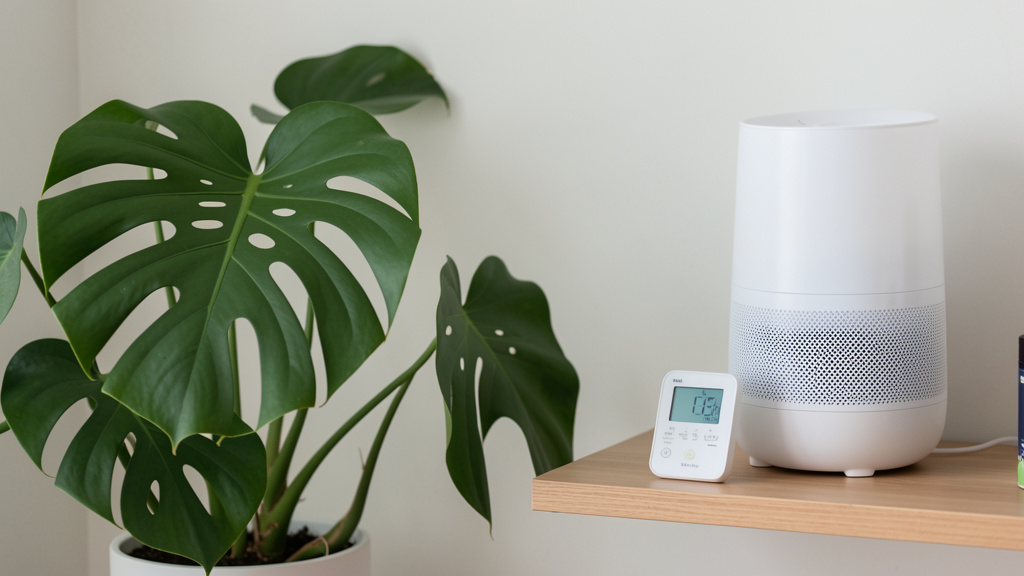
– Digital hygrometer-thermometer: Inexpensive models ($10–$20) suffice for plant care. Crucially: Position the sensor at your plant’s leaf height, not floor or ceiling level. Allow 24 hours for acclimation before recording.
– Observational cues (supplemental): Note window condensation (high humidity meeting cold glass), static shocks (very low humidity), cracking in wood items (prolonged dryness), visible mold (sustained high humidity + poor airflow), or consistent plant symptoms.
– Simple sketch: Draw a basic floor plan of key living areas to annotate findings.
-
Measure systematically:
- Room baseline: Record readings at plant height in each main area (living room, bedroom, etc.) at three times: early morning (pre-heating cycle), mid-afternoon (peak system activity), and evening (after hours of operation). Repeat for three consecutive days.
- Proximity checks: Within rooms, measure:
- Near heating/cooling vents or radiators (6 inches away)
- On windowsills (inside) and 1 foot inward
- Center of room vs. near exterior walls
- Different shelf heights (floor, waist, eye level)
- Heating impact test: Note humidity/temperature 30 minutes before heating activates, then again 60–90 minutes after. Many homes see relative humidity drop noticeably (e.g., from near 50% down to 30%) during heating cycles.
- Seasonal rhythm: Repeat audits quarterly. Winter heating lowers humidity; summer cooling may dehumidify excessively or inadequately depending on climate. Spring/fall transitions are ideal for plant rearrangement.
-
Create your Microclimate Map: Transfer data to your sketch using clear labels:
- Dry zones (Often <35% RH during heating): Directly in vent airflow paths, above radiators, near drafty doors/windows. Example: “Living Room shelf above radiator: 80°F (27°C), 25% RH during heating cycle.”
- Moderate zones (40–60% RH, stable temps): Interior rooms away from direct heat/cool sources, hallways. Suitable for adaptable plants (pothos, snake plant).
- Humid zones (>60% RH): Bathrooms (post-shower), kitchens (during cooking), laundry areas. Example: “Bathroom vanity: 72°F (22°C), 65–75% RH baseline; spikes during shower, stabilizes within an hour.”
- Draft zones (Temp swings >10°F / 5.5°C): Near leaky windows, under doors. Challenging for temperature-sensitive plants.
- Light-humidity notes: “South window shelf: Bright light BUT radiator below creates dry microclimate (28% RH). Unsuitable for humidity-loving plants without barrier.”
Sample Audit Summary:
| Location | Typical Temp | Typical Humidity | Key Influences | Suitable Plant Types |
| :— | :— | :— | :— | :— |
| Living Room: Shelf away from vent | 68–74°F (20–23°C) | 38–48% | Heating cycles; double-pane window | Moderate humidity plants (Pothos, Spider Plant) |
| Kitchen: Countertop near sink | 67–76°F (19–24°C) | 45–65% | Cooking steam; sink evaporation | Moderate to High humidity plants (Herbs, Calathea) |
| Bathroom: Vanity (no window) | 69–75°F (21–24°C) | 60–78% | Shower steam; consistent temp; low light | High humidity, low-light plants (Ferns, Peace Lily) |
| Bedroom: North window sill* | 62–70°F (17–21°C) | 35–45% | Single-pane window (drafty); baseboard heat | Low humidity plants (Snake Plant, Cast Iron Plant) |
*May benefit from pebble tray during peak heating hours.
Common auditing mistakes:
– Relying on perception: Human skin is unreliable for humidity assessment. A room feeling “comfortable” to humans may be physiologically dry for tropical plants.
– Ignoring vertical differences: Heat rises. Air at shelf height may be significantly warmer and drier than at floor level. Always measure where leaves reside.
– Single-time measurement: One reading on a mild day reveals little about winter heating or summer cooling impacts. Consistency reveals patterns.
– Overlooking localized dryness: Electronics (computers, TVs) emit gentle dry heat. Plants placed directly beside them experience micro-dry zones.
Illustrative application: An orchid collection placed on a south windowsill above a radiator showed repeated bud drop and stunted growth, despite room humidifier use. The audit revealed the critical conflict: while the room averaged 45% humidity, the exact spot on the sill registered near 90°F (32°C) and 20% RH during heating cycles. Relocating orchids to a nearby table (72°F / 22°C, 48% RH) and adding a small, timed humidifier during evening heating hours resolved the issue. New blooms developed successfully within one growth cycle. The audit identified the precise environmental mismatch generic advice missed.
The Fundamental Principle: Plants primarily respond to the microclimate at their leaf surface and root zone—which can differ significantly from the room’s average conditions. Precision placement, informed by observation, is often more impactful and sustainable than broad environmental adjustments.
Step 3: Implement Targeted Climate Solutions (The Human Context Integration)
With your Plant Profile and Home Climate Map complete, deploy solutions that are effective, sustainable, and aligned with your lifestyle, budget, and living constraints. This step rejects one-size-fits-all fixes in favor of layered strategies: Passive (leveraging existing conditions), Active (targeted tools), and Behavioral (habit integration). Prioritize passive methods first—they are often more stable, energy-conscious, and create less dependency. The goal is synergy: combining approaches to create buffered, resilient microclimates.
Why layered solutions build resilience: A humidifier alone cannot compensate for placing a fern directly in a heating vent’s airflow. However, combining relocation (passive), strategic grouping (passive), a pebble tray (passive), and timed humidification (active) creates multiple supportive layers. This approach inherently respects constraints: renters avoid permanent changes; budget-conscious users maximize free methods; busy individuals choose low-maintenance tactics; pet owners prioritize safety. Sustainability—practical and environmental—is woven into the framework.
Layer 1: Passive Adjustments (Zero Cost, High Impact, Foundational)
These leverage your existing environment and plant biology. Implement these before considering tools.
-
Strategic Relocation (Most impactful action): Match plant profiles directly to your microclimate map zones.
- High-humidity plants (Ferns, Calatheas, Orchids): Group in naturally humid areas like bathrooms (if light permits—supplement with a small LED grow light if needed), kitchens away from stove heat, or near aquariums. Position away from all vents, radiators, and drafty windows.
- Low-humidity plants (Succulents, Cacti, ZZ Plants): Place in drier rooms (bedrooms with heating), on shelves near electronics (which emit gentle dry heat), or in sunrooms. These often thrive where moisture-loving plants struggle.
- Critical guideline: Avoid placing any plant directly in the path of heating vents, radiators, baseboard heaters, or AC units. Even desert-adapted plants can suffer from forced hot/cold air causing rapid moisture loss or thermal stress. Maintain several feet of clearance where possible. This single adjustment resolves many common issues.
-
Plant Grouping (Community Effect): Cluster plants with similar humidity needs closely. Collective transpiration naturally elevates humidity in their immediate vicinity. This creates a beneficial microclimate without added energy use. Amplify by placing the group on a single large pebble tray.
-
Barrier Creation (Deflecting airflow): Use physical objects to shield plants from dry drafts or intense radiant heat.
- Position a bookshelf, room divider, or folding screen between plant groups and heat sources or drafty windows.
- For radiators: Consider commercially available heat deflectors designed to redirect warmth upward, creating a more habitable zone nearby. Safety note: Ensure any product complies with safety standards for your radiator type and does not block essential ventilation. Never place flammable materials directly on or against hot surfaces.
- For drafty windows: Use thermal-backed curtains. Close them during cold nights to buffer temperature drops; open during sunny days for light.
-
Water Tray Systems (Pebble Trays): A highly effective passive humidification method for targeted zones.
- How to implement: Fill a shallow tray (larger than the plant pot) with pebbles, LECA balls, or clean stones. Add water to just below the pebble tops. Place the plant pot on the pebbles, ensuring drainage holes are not submerged. As water evaporates, it humidifies the air immediately surrounding the plants.
- Why it works: Evaporation increases with ambient temperature—naturally producing more humidity precisely when heating runs and air is driest. The effect is localized (effective within 12–18 inches), ideal for plant groups without over-humidifying the whole room.
- Maintenance: Refill with room-temperature water every 1–3 days. Empty, clean the tray, and refresh pebbles weekly to prevent algae or mineral buildup. Using distilled or filtered water minimizes deposits.
- Scaling: One tray serves 1–3 small-to-medium plants. For larger collections, use multiple trays or a single large tray (e.g., plastic storage bin lid). This is significantly more effective and safer than routine misting.
Layer 2: Active Devices (Targeted Investment for Precision)
When passive methods are insufficient (per your audit), tools provide reliable support. Choose based on documented needs, not marketing.
-
Humidifiers (Selecting and Using Wisely):
- Types overview:
- Ultrasonic (Cool Mist): Creates fine mist via vibration. Quiet and efficient. Best for: Bedrooms, offices, near plant groups. Important: Using tap water with minerals may cause visible “white dust.” Use distilled, demineralized, or filtered water. Some models include demineralization cartridges.
- Evaporative (Wick/Fan-Based): Blows air through a moistened wick. Best for: Larger rooms. Advantage: Self-regulating—drier air pulls more moisture; humidity rise slows evaporation. Less risk of over-humidifying. Minimal mineral dispersion.
- Warm Mist (Vaporizer): Boils water to create steam. Considerations: Higher energy use, potential minor burn risk (keep away from children/pets), adds warmth. Less commonly ideal for plant-focused use.
- Sizing: Match output (gallons/liters per day) to room size. Undersized units run constantly without effect; oversized units may over-humidify.
- Placement: Position 3–6 feet from plant groups, elevated (not on floor). Allow mist to disperse into room air before reaching plants. Never point mist directly at leaves. Constant leaf wetness without airflow invites fungal issues. Place your hygrometer next to plants, not the humidifier, to monitor actual conditions.
- Smart integration: Use a humidifier with built-in hygrometer/auto-shutoff, or pair a basic unit with a humidity-sensing smart plug. Set a target range (e.g., 45–55% for mixed groups). Program timers to align with heating cycles (e.g., run during daytime heating hours).
- Budget alternative: Place wide, shallow bowls of water near heat sources. Adding natural sponges increases evaporation surface area. Less precise but adds measurable moisture.
- Types overview:
-
Dehumidifiers (For persistently damp zones): Useful if audits show humidity consistently above 70% in plant areas (increasing mold or pest risks). Place in basements, poorly ventilated bathrooms, or humid-climate rooms. Ensure plants aren’t in the direct exhaust airflow (warm and very dry). Use units with humidistats to maintain a target (e.g., 55%).
-
Air Circulation (Essential companion): Gentle airflow prevents stagnant, humid pockets (breeding grounds for mold/pests), strengthens stems, and ensures even humidity/temperature distribution.
- Implementation: Use a small oscillating or USB fan on the lowest setting. Position to create gentle movement around plants, not a direct blast onto leaves. Aim for a faint breeze detectable near plants. Run continuously on low. This is a highly cost-effective upgrade for plant health.
-
Timers and Smart Controls: Simple timer plugs automate humidifiers, fans, or grow lights. Smart thermostats allow nuanced heating schedules (e.g., slightly lower overnight temperatures, which many plants tolerate well and may reduce humidity demand).
Layer 3: Behavioral and Seasonal Habits (Integrating Care into Life)
Sustainable care aligns with natural routines.
- Watering timing: Water plants in the morning. As room temperature rises during the day (especially with heating), soil evaporation adds ambient humidity around the plant. Avoid heavy evening watering in low-airflow areas, as prolonged soil dampness overnight may encourage fungal growth.
- Controlled steam exposure: For small groups of humidity-loving plants (ferns, orchids), bring them into the bathroom during your regular shower once weekly. Close the door. Limit exposure to 15–20 minutes. Ensure plants are away from direct water spray. Afterward, allow gradual air exchange. Avoid for plants prone to crown rot (e.g., African violets) or with fuzzy leaves that trap moisture.
- Seasonal rotation protocol:
- Late Fall (Heating begins): Conduct winter audit. Relocate sensitive plants away from heat sources. Implement pebble trays and grouping. Set up humidifiers on timers. Clean humidifier tanks thoroughly before first use.
- Late Winter/Spring (Transition): Re-audit as heating decreases. Gradually reduce humidifier runtime. Ideal time for repotting, pruning, and resuming fertilization as growth resumes. Rotate plants for even light exposure.
- Late Spring (Cooling begins): Audit for AC impact. Central AC dehumidifies; monitor levels. Use humidifiers if levels drop below 40% due to AC. Ensure plants aren’t in direct AC airflow (can cause chilling injury).
- Late Summer (Humidity peaks): Monitor for excessive humidity (>70%). Increase airflow with fans. Reduce watering frequency. Watch for mold or pests. Clean dehumidifier filters if used.
- Vacation protocol: For absences >3–4 days: Group plants in the most naturally humid room (bathroom). Place all pots on large, filled pebble trays. Water thoroughly. Close curtains to reduce light/heat stress. For sensitive collections, use a timer-controlled humidifier for short midday intervals. Avoid self-watering spikes in high-humidity setups—they may lead to oversaturation. For low-humidity plants, a thorough pre-departure watering is often sufficient.
Critical implementation considerations:
– Misting limitations: Misting provides only brief humidity relief (typically under 30 minutes). More importantly, frequent leaf wetness without strong, consistent airflow creates conditions favorable for fungal or bacterial issues. Water droplets can magnify sunlight, causing leaf scorch. Reserve misting for specific purposes: gently cleaning dust from large smooth leaves (monstera); providing moisture for epiphytes that absorb through leaves (certain orchids, air plants) in well-ventilated areas; or as a quick diagnostic test (if a wilting plant perks up immediately after misting, it may indicate heat/draft stress rather than underwatering). For sustained humidity needs, pebble trays and humidifiers are safer and more effective.
– Avoiding over-humidification: Consistently high humidity (>75–80%) without excellent airflow may shift pest pressures (e.g., reducing spider mites but encouraging fungus gnats) or promote mold. Target the minimum humidity your most sensitive plant requires. Balance is key. Use your hygrometer data.
– Observing plant feedback: Plants communicate continuously. If new growth is vibrant but older leaves show minor browning, current conditions are likely adequate now; past conditions caused the damage. Patience is needed. If new growth is small, pale, or distorted, current conditions may be suboptimal. Adjust solutions incrementally and observe for 2–4 weeks before further changes. Avoid reacting to every minor symptom with drastic measures.
– Device maintenance: A poorly maintained humidifier can disperse minerals, bacteria, or mold spores. Clean tanks and components every 2–3 days during use with white vinegar or mild bleach solution (rinse thoroughly). Replace filters per manufacturer guidance. A clean device supports both plant and household health.
Illustrative application: A renter in a drafty apartment felt overwhelmed by conflicting advice and lease restrictions. Using the Climate Triad: 1) Profiled plants, grouping calathea, fern, and prayer plant as “Higher Humidity Needs” and ZZ/snake plant as “Lower Humidity.” 2) Audit revealed the living room radiator created an extreme dry zone (<25% RH) on the adjacent shelf, while the bathroom maintained 65%+ RH. 3) Implementation: Placed the humidity-loving group on a wheeled cart with a custom pebble tray in the bathroom near a north window (supplementing light with a small clip-on LED on a timer). Ran a small ultrasonic humidifier only in the bathroom on a timer during evening heating, targeting 60% (monitored by hygrometer). The low-humidity group stayed on the sunny bedroom shelf near a computer. Within weeks, the calathea produced new vibrant leaves; the fern fronds were lush. The layered, constraint-aware approach delivered results without lease violations or significant expense. Starting with passive methods (grouping, relocation, pebble tray), adding minimal active support (targeted humidifier), and integrating habits (timed light) created sustainable success.
Navigating Common Frictions: Renters, Budgets, Space, and Safety
Real-world constraints require adaptable solutions. This section offers practical, empathetic alternatives ensuring the Climate Triad remains accessible across diverse living situations. Focus on safety, reversibility, and maximizing impact with available resources.
For Renters: Non-Permanent, Landlord-Friendly Adjustments
Renters often face modification restrictions. Prioritize portable, reversible methods demonstrating responsible stewardship.
– Portable barriers: Freestanding room dividers, folding screens, or bookshelves on casters can block drafts or create sheltered microclimate zones without installation.
– Adhesive hooks cautiously: For hanging plants away from problem areas, use high-quality removable adhesive hooks rated for the weight. Test on an inconspicuous area first. Remove carefully with low-heat hairdryer to minimize residue. Never use nails, screws, or permanent adhesives without explicit permission.
– Portable climate tools: Humidifiers, dehumidifiers, and small fans on caster wheels are entirely portable. Store cords neatly. The space returns to original condition upon moving.
– Thermal curtains: Hang using tension rods (no drilling) on drafty windows. Buffers temperature fluctuations for nearby plants and improves home energy efficiency—a point positively framed with landlords. Remove easily when vacating.
– Proactive communication: Frame requests positively: “I’d like to add a temporary, freestanding screen near the radiator to protect plants from direct heat—would that be acceptable? It also helps prevent soil spills near the heat source.” Many landlords appreciate tenants maintaining property condition. Document space condition (photos) before moving in and after reversible changes.
Budget-Conscious Strategies: Maximizing Impact with Minimal Spend
Thriving plant care does not require expensive tools. Prioritize high-leverage, low-cost methods.
– Under $5:
– DIY Pebble Trays: Repurpose thrifted baking sheets, plastic lids, or sturdy trays. Source pebbles affordably or clean safe outdoor stones. The single most cost-effective humidity solution.
– Strategic Grouping: Rearrange existing plants. No cost, high impact via community effect.
– Water Bowls: Place shallow bowls of water near heat sources. Add dedicated kitchen sponges to increase evaporation surface area.
– Secondhand Hygrometer: Check local online marketplaces. Verify accuracy using the “salt test”: Seal hygrometer in a small jar with damp (not wet) paper towel sprinkled with table salt. After 6–8 hours, it should read ~75% RH. Adjust or discard if inaccurate.
– $5 – $30:
– Small Ultrasonic Humidifier: Prioritize models with auto-shutoff when empty (critical safety feature). Look for sales or refurbished units. Justifiable if consistently losing plants to dry air; frame as prevention.
– USB Desk Fan: Provides essential airflow for under $15. Run continuously on low.
– Thermal Curtain Liners: Inexpensive liners add to existing curtains using clip rings (no sewing).
– Investment perspective: Track plant losses. If replacing a $25 plant twice due to environmental stress, a $25 humidifier represents prevention. Start with the cheapest effective solution (pebble tray) before escalating.
Small Spaces and Apartments: Vertical and Multi-Functional Solutions
Limited square footage demands intentionality.
– Vertical gardening with awareness: Use wall-mounted pocket planters (ensure waterproof backing) for small humidity-loving plants (ferns, fittonia). Position strategically: near (not directly in front of) humidifier dispersion, or in a naturally humid bathroom corner. Crucially: Avoid placing vertical gardens directly above radiators—heat rises and desiccates upper pockets fastest. Monitor humidity at different heights.
– Multi-functional furniture: Choose plant stands with lower shelves for trays. Use ottomans with storage for supplies. A rolling utility cart becomes a mobile plant sanctuary—position in optimal zones and move as seasons change.
– Zone stacking: Utilize vertical space thoughtfully. Place low-light, moderate-humidity plants (ZZ, snake plant) on lower shelves. Position high-light plants on upper shelves near windows—but verify via audit that upper shelf isn’t in a dry heat plume. Use a small fan on the floor blowing gently upward to circulate air through the stack.
– Symbiotic sharing: Position humidity-loving plants near (not above) an aquarium. Tank evaporation benefits plants; plants may help filter ambient air. Similarly, place plants near the kitchen sink area where routine dishwashing adds ambient moisture.
When Heating Systems Are Fixed Features (Baseboard, Radiators, Vents)
Adapt with barriers, redirection, and buffering.
– Heat deflectors: Consider safety-certified radiator deflectors designed to redirect warmth upward, making space on a shelf 12–18 inches above potentially habitable. Verify compatibility and safety ratings for your specific system.
– Heat-resistant buffering: Place thick ceramic tiles, slate coasters, or heat-resistant mats between a radiator and a plant shelf. These absorb and diffuse radiant heat. Use a thermometer to verify temperature at pot level is within the plant’s range.
– Elevated shelving: Install floating shelves significantly above radiator height (minimum 24–30 inches). Heat rises rapidly; air higher up is often cooler and less dry. Use audit data to find the “sweet spot.” Ensure secure mounting.
– Hydration focus for unavoidable proximity: For plants near heat sources (e.g., a sun-loving cactus on a windowsill above a radiator), self-watering pots may help counteract rapid soil drying—but monitor soil moisture closely to avoid overwatering. Prioritize drought-tolerant plants for these challenging spots.
Safety First: Humidity, Electronics, Pets, and Home Integrity
Balance plant needs with household safety and structural integrity.
– Humidifier placement: Maintain clearance between humidifiers (and mist dispersion) and electronics, books, wooden furniture, musical instruments, and artwork. Moisture can cause corrosion or warping. Use a hygrometer to ensure overall room humidity stays within ranges generally safe for homes (typically 30–60% supports wood integrity; sustained levels above 65% may increase mold risk on surfaces).
– Mold prevention: In high-humidity zones (bathrooms, kitchens), run exhaust fans during and 20–30 minutes after moisture-producing activities. Wipe window condensation promptly. If wall mold appears, address underlying ventilation or insulation issues before focusing on plants—structural and health safety is paramount. For soil surface mold, gently scrape it off, sprinkle top soil with cinnamon (a natural fungistatic), and improve airflow.
– Fire and burn safety: Never place plants, trays, fabrics, paper, or combustibles directly on or against radiators, baseboard heaters, or vents. Maintain manufacturer clearances. Warm mist humidifiers pose a minor scald risk; place securely out of reach. Ensure electrical cords are in good condition and not pinched.
– Water damage prevention: Always use trays with adequate drainage under pots and pebble trays. Place felt pads under pots on wooden surfaces. For homes with pets or young children, secure humidifiers to prevent tipping (use museum putty on base). Empty and clean humidifier tanks regularly to prevent microbial growth.
– Pet and child safety integration: Research plant toxicity thoroughly using resources like the ASPCA’s Toxic and Non-Toxic Plant List. Place toxic plants (peace lily, dieffenbachia, pothos) in hanging planters, on high secured shelves, or behind barriers. For humidifiers, cool mist ultrasonic models eliminate burn risk. Secure cords. Use pet-safe deterrents (citrus peels on soil—cats often dislike citrus) if pets dig. Remember: A safe environment for your household is the essential foundation for enjoying plants.
This friction-focused approach ensures the Climate Triad remains robust and adaptable. Imperfect implementation with consistent, mindful adjustment consistently yields better results than theoretically perfect solutions abandoned due to obstacles. Start with one single, achievable adjustment aligned with your constraints—observe results for two weeks—and build from there. Progress, not perfection, is the goal.
Advanced Scenarios: Troubleshooting Complex Interactions
Even with a solid framework, nuanced challenges arise where humidity, heating, plant physiology, and external factors intersect. This section provides diagnostic pathways and resolution protocols for complex, real-world situations. Each scenario moves beyond surface symptoms to address root causes.
Scenario 1: “My Plants Thrive in Summer But Consistently Struggle in Winter”
Root Cause Analysis: Winter heating drastically reduces relative humidity. Cold outdoor air holds minimal moisture. When drawn indoors and heated, its moisture-holding capacity increases while its actual moisture content remains low—causing relative humidity to plummet, often to 20–30%. Shorter daylight hours reduce photosynthetic activity, making plants more vulnerable. Cold drafts from windows may cause localized chilling injury. The combination creates significant stress.
Diagnostic Checklist (Perform a Winter Audit):
– Are brown, crispy leaf tips appearing specifically on thin-leaved plants (ferns, calatheas)?
– Is soil drying out faster than in summer despite similar watering?
– Do plants near windows show dark, water-soaked spots on very cold nights? (Possible chilling injury)
– Is there heavy window condensation in mornings? (Indicates indoor humidity meeting cold glass—a microclimate issue at the window)
– Are pests like spider mites suddenly appearing? (They proliferate in hot, dry conditions)
Resolution Protocol:
1. Conduct a targeted winter audit: Focus measurements during heating hours. Note the lowest humidity readings and temperature fluctuations near windows and heat sources.
2. Prioritize strategic relocation: Move sensitive plants away from windowsills (especially single-pane) at night. Create a “Winter Sanctuary” in the most stable interior location—hallway, closet with grow lights, or room away from exterior walls. Use thermal curtains on windows at night to buffer drafts and reduce condensation.
3. Layer humidity solutions:
– Group humidity-loving plants tightly together.
– Place the group on one or more large, filled pebble trays.
– Deploy a humidifier on a timer during peak heating hours (e.g., 6:00 AM to 10:00 PM). Set a realistic target (e.g., 45–50%). Verify with hygrometer at plant level.
4. Adjust watering mindfully: Water less frequently than summer, but thoroughly when needed. Rely on the finger test (top 1–2 inches of soil dry) rather than a calendar. Use room-temperature water to avoid root shock.
5. Supplement light strategically: Place high-light plants in the brightest available winter window (south-facing in Northern Hemisphere). For critical plants or low-light rooms, add full-spectrum LED grow lights for 2–4 hours during the dimmest part of the day (e.g., 10 AM – 2 PM).
6. Embrace natural dormancy: Accept that growth may slow or pause. Avoid fertilizing until consistent spring growth resumes (typically late winter/early spring in temperate zones). This reduces metabolic demand during a stressful period. Patience is key; focus on maintaining health, not promoting growth.
Why it works: This protocol holistically addresses winter’s triple challenge: low humidity (layered humidification), temperature instability (relocation and barriers), and reduced light (supplementation). By reducing plant metabolic demands and creating a buffered microclimate, plants enter a resilient dormancy rather than chronic stress. Spring growth will be stronger.
Scenario 2: “I Use a Humidifier Consistently, But Sensitive Plants Still Develop Brown Leaf Tips”
Root Cause Analysis: Brown leaf tips indicate cellular damage at margins, often from inconsistent moisture availability. A humidifier alone may not resolve this if placement is ineffective (mist not reaching plant microclimate, causing wet/dry cycles), humidity fluctuates wildly, or underlying issues mimic humidity problems: water chemistry sensitivity (fluoride/chlorine in tap water for spider plants, dracaenas), fertilizer salt buildup, or root constraints limiting water uptake to leaf tips.
Diagnostic Checklist:
– Is the hygrometer placed next to the plant’s leaves, or near the humidifier? Check readings hourly for 4 hours—do they swing dramatically (e.g., 35% → 65% → 40%)?
– Is the plant directly in the humidifier’s mist path? (Leaves should never be constantly wet)
– When did browning start? After repotting? Fertilizing? Relocating?
– Gently remove the plant. Are roots densely circling the root ball (root-bound)? Is soil compacted?
Resolution Protocol:
1. Verify humidifier function and placement: Move hygrometer sensor to rest among the leaves of the struggling plant. Monitor for 24 hours. If fluctuations exceed 15%, adjust: increase humidifier distance, add a small fan for dispersion, or use a smart plug to maintain a tighter humidity band (e.g., 48–52%). Ensure mist disperses into room air, not blasting the plant.
2. Rule out water quality issues: For sensitive plants (Dracaena, Spider Plant, Calathea, Peace Lily), switch to distilled water, rainwater, or filtered water. Flush soil thoroughly once a month by slowly pouring room-temperature water through the pot until it runs clear—this leaches accumulated salts and minerals.
3. Inspect root health: If roots are densely matted or circling, the plant is likely root-bound. Repot into a container only 1–2 inches larger with fresh, well-draining mix. Gently loosen the root ball. Trim any mushy or discolored roots with sterilized scissors. This restores efficient water uptake to leaf tips.
4. Address existing damage: Use sharp, clean scissors to trim brown tips at an angle following the leaf’s natural shape. This prevents progression. Do not remove entire leaves unless >50% is damaged.
5. Optimize airflow: Add a small USB fan on the lowest setting nearby to ensure humid air circulates evenly around the plant, eliminating dry micro-pockets and strengthening stems.
6. Patience and monitoring: New growth should emerge with healthy green tips if the root cause is addressed. Existing brown tips won’t heal, but progression should halt within 2–3 weeks. Continue monitoring soil moisture and humidity.
Why it works: This protocol moves beyond “more humidity” assumptions. By systematically eliminating other common causes (water quality, root issues, inconsistent humidity) and ensuring the humidifier functions effectively for the specific plant’s location, it targets the true failure point. Consistency and holistic care (water, roots, air) are prioritized.
Scenario 3: “My Home Feels Damp, Humidity Reads Above 70%, and Plants Are Developing Mold or Attracting Fungus Gnats”
Root Cause Analysis: Sustained high humidity (>70%) combined with poor airflow creates favorable conditions for fungal pathogens (powdery mildew, soil mold) and pests like fungus gnats (larvae thrive in consistently moist soil). Common in basements, bathrooms without exhaust fans, humid climates with inadequate AC dehumidification, or overzealous humidification without monitoring.
Diagnostic Checklist:
– Is there visible white, gray, or fuzzy mold on soil surface or leaf spots?
– Are tiny black flies (fungus gnats) hovering around soil or emerging when watering?
– Does the air feel stagnant? Musty odor present?
– Are plant leaves touching each other or surfaces, trapping moisture?
– Is soil surface constantly damp days after watering?
Resolution Protocol:
1. Immediate isolation: Quarantine affected plants away from healthy ones to prevent spread of spores or pests.
2. Radically improve airflow (Most critical step):
– Space plants farther apart—ensure leaves do not touch.
– Position a small oscillating fan on the lowest setting for gentle, continuous air movement. Non-negotiable for resolving high-humidity issues.
– Open windows when outdoor humidity is lower than indoor (check weather app). Cross-ventilation is highly effective.
3. Reduce moisture sources:
– Water only when the top 1.5–2 inches of soil are dry. Use the finger test rigorously.
– Remove saucers holding standing water under pots. Ensure pots have drainage holes.
– Gently scrape off visible mold from top inch of soil. Replace with fresh, sterile potting mix.
4. Deploy targeted dehumidification:
– Run a dehumidifier in the affected room. Set humidistat to maintain 50–55% RH. Empty tank regularly or use continuous drain.
– For small areas, place breathable silica gel pouches nearby—but keep out of reach of pets/children and not in direct plant contact.
– Ensure bathroom/kitchen exhaust fans run during and 20–30 minutes after showers or cooking.
5. Address biological issues:
– Soil mold/fungus gnats: Allow top soil layer to dry thoroughly. Apply a thin layer of food-grade diatomaceous earth (DE) to dry soil surface (wear mask when applying). DE desiccates gnat larvae. Use yellow sticky traps for adult gnats. For persistent cases, biological controls containing Bacillus thuringiensis israelensis (BTI) added to water are effective and plant-safe.
– Leaf mildew/mold: Wipe affected leaves gently with a soft cloth dampened with a solution of 1 tsp neem oil, 1 quart water, and a few drops of mild dish soap (emulsifier). Test on one leaf first; wait 48 hours. Remove severely affected leaves.
6. Re-evaluate placement and suitability: Move humidity-sensitive plants (succulents, cacti) out of this zone. Accept that some spaces (e.g., unventilated basement corner) may not suit most plants. Focus collections where balanced conditions (40–60% humidity with airflow) can be maintained.
Why it works: This protocol attacks the core issue: stagnant, moist air. Airflow is prioritized because it prevents moisture buildup and inhibits pathogen/pest development. Reducing moisture inputs and dehumidification provide essential support. Treatment is targeted. Prevention through environmental management is emphasized over reactive chemical use.
Scenario 4: “I Have Pets (or Young Children), and I’m Concerned About Humidifier Safety or Plant Toxicity”
Root Cause Analysis: Safety concerns are valid and paramount. Humidifiers can pose tipping risks, disperse minerals/bacteria if unmaintained, or present burn risks (warm mist). Many popular humidity-loving plants contain compounds that may cause irritation if ingested by pets or children. A successful strategy integrates safety seamlessly into planning.
Diagnostic Checklist:
– What humidifier type is used or planned? (Cool mist ultrasonic is generally safest)
– Are pets prone to chewing plants, knocking objects, or drinking from trays?
– Have all plants been cross-referenced with authoritative toxicity resources (e.g., ASPCA)?
– Where are cords located? Are they accessible?
Resolution Protocol:
1. Safety-focused plant selection:
– For humid zones (Bathrooms, Kitchens): Choose non-toxic options: Boston Fern, Parlor Palm, Spider Plant (may cause mild stomach upset in cats but generally safe), Cast Iron Plant, Peperomia species, certain Calatheas (verify species).
– Avoid in accessible areas: Lilies (highly toxic to cats), Peace Lily, Pothos, Philodendron, Dieffenbachia, ZZ Plant, Snake Plant. Note: “Non-toxic” does not mean “edible.” All plants may cause mild stomach upset if ingested.
– Strategic placement: Hang plants in macrame hangers near ceilings. Place on high shelves secured to wall studs. Use room dividers or gates to create pet/child-free zones around collections.
2. Humidifier safety practices:
– Type: Choose a cool mist ultrasonic humidifier with automatic shut-off when empty. Eliminates burn risk and prevents motor damage.
– Placement: Position on a sturdy, elevated surface inaccessible to pets/children. Secure base with museum putty or non-slip mat to prevent tipping.
– Water quality: Always use distilled or demineralized water. Prevents mineral dispersion (“white dust”) and reduces bacterial growth inside the tank.
– Maintenance: Clean tank and components every 2–3 days with white vinegar or mild bleach solution (rinse thoroughly). Prevents dispersal of microbes into the air.
3. Alternative humidity methods:
– Pebble Trays: Place where pets cannot easily drink the water. Use trays with narrow openings or cover water surface with decorative glass gems allowing evaporation but preventing access. Change water daily.
– Closed Terrariums: For high-humidity plants, create a sealed or vented terrarium in glass. Contains humidity, protects plants, and is visually appealing. Ensure adequate ventilation if sealed.
– Room barriers: Use decorative dividers or gates to section off a plant corner while allowing light and air circulation.
4. Deterrents and education:
– For pets prone to digging: Sprinkle citrus peels on soil surface (cats often dislike citrus). Use pet-safe deterrent sprays on pot rims (test first). Provide safe alternatives (cat grass).
– For children: Teach plant respect early. Use clear language: “Plants are for looking, not tasting.” Place sensitive plants out of reach. Involve children in safe care tasks (watering with supervision, wiping leaves).
Why it works: Safety is integrated into the core of planning rather than treated as an afterthought. Proactive plant selection and placement prevent conflicts. Humidifier safety protocols address specific risks with concrete actions. The focus shifts from restriction (“I can’t have plants”) to empowered curation (“I can have these beautiful, safe plants in this optimized space”). Safety and botanical enjoyment coexist.
Your Questions, Answered
Q: What is a practical humidity target for a mixed collection of common houseplants?
A: A range of 40% to 60% relative humidity generally supports the majority of popular houseplants. This accommodates adaptable species (pothos, snake plant, ZZ plant) at the lower end (40–50%) and common tropicals (peace lily, monstera, philodendron) at the higher end (50–60%). This range also aligns with typical human comfort and home maintenance guidelines (minimizing risks to wood or structures above 60%). Refine based on your Plant Profile: aim higher (60%+) for true humidity lovers (ferns, calatheas, orchids); lower ranges (30–50%) suit succulents and cacti. Always pair humidity management with gentle airflow to support plant health.
Q: Is misting an effective way to increase humidity for my plants?
A: Misting provides only very brief humidity elevation—typically under 30 minutes—and is generally ineffective for meeting sustained humidity needs. More importantly, frequent leaf wetness without strong, consistent airflow can create conditions favorable for fungal or bacterial issues, especially on plants with fuzzy leaves (African violets) or dense foliage. Water droplets may also magnify sunlight, causing leaf scorch. Reserve misting for specific, limited purposes: gently cleaning dust from large, smooth leaves (monstera); providing targeted moisture for epiphytic plants that absorb through leaves (certain orchids, air plants) only in well-ventilated areas; or as a quick diagnostic test (if a wilting plant perks up immediately after misting, it may indicate heat/draft stress rather than underwatering). For meaningful, sustained humidity support, prioritize pebble trays, strategic plant grouping, or properly placed humidifiers with airflow.
Q: How do different heating systems specifically affect plant humidity, and what are tailored approaches?
A: All heating systems reduce relative humidity by warming air (increasing its moisture capacity), but their mechanisms create distinct microclimate challenges:
– Forced-Air Furnaces: Circulate large volumes of dry, heated air, causing rapid humidity drops and strong drafts. Approach: Avoid placing plants directly in supply vent airflow paths. Use vent deflectors to redirect airflow upward. Group plants away from return vents (which can create localized dry spots). Portable humidifiers in plant rooms can help, placed away from vents. Whole-house humidifiers (if integrated and maintained) offer broader support.
– Hydronic Radiators (Hot Water/Steam): Emit intense radiant heat, creating severe dry zones directly above and within 1–2 feet of the surface. Approach: Maintain several feet of clearance between plants and radiators. Install certified heat deflectors to redirect warmth upward. Place humidity-loving plants on shelves significantly above (24+ inches) the radiator where air is less intense. Use pebble trays on nearby surfaces. Avoid placing plants on radiator covers.
– Electric Baseboard Heaters: Create a horizontal band of dry, warm air at heater height along exterior walls. Approach: Elevate plants on shelves or stands above heater level. Use thermal curtains on windows above baseboards to buffer cold drafts interacting with heater output. A small fan on the floor can gently circulate air upward, reducing stratification.
– Heat Pumps (Ductless Mini-Splits): Can be very drying, especially in dehumidify mode. The indoor unit blows air directly. Approach: Position plants well away from the air handler’s airflow path. Use the unit’s swing function to direct airflow toward the ceiling. Supplement humidity locally with pebble trays or a small humidifier near plant groups.
In all cases, a hygrometer placed at plant leaf level provides essential insight into your specific conditions.
Q: Is it ever advisable to place a plant directly on or immediately above a heat source?
A: It is strongly discouraged. Placing a plant directly on or immediately above a heat source (radiator, vent, baseboard heater) typically causes significant stress or damage:
– Radiators: Surface temperatures can become very high, potentially “cooking” roots and rapidly desiccating leaves. Even proximity (within 12 inches) often creates a microclimate too hot and dry for most plants.
– Vents (Forced Air): The blast of dry, warm air accelerates moisture loss from leaves, leading to scorching, browning, and leaf drop. Dust from ducts may also clog leaf stomata.
– Safety consideration: Placing combustible materials (pots, soil, trays) directly on heating elements is a potential fire hazard and violates most safety guidelines.
Instead, create distance and use barriers. Position plants several feet away from heat sources, use deflectors where appropriate, and leverage your Home Climate Audit to find the most suitable nearby location. Strategic relocation is consistently more effective and safer than attempting to mitigate conditions directly atop a heat source.
Q: How can I tell if my plant is getting too much humidity?
A: Signs of excessive humidity (especially when combined with poor airflow) may include: persistent dampness on soil surface long after watering, visible mold or fuzzy growth on soil, increased presence of fungus gnats (tiny black flies hovering near soil), yellowing leaves without other clear cause, or soft, mushy stems/leaves (particularly in succulents or cacti). In high-humidity environments, ensure strong emphasis on airflow (small fan), allow soil to dry more thoroughly between waterings, and verify your hygrometer readings. Remember: “too much” is relative to the plant’s needs—what is excessive for a cactus is essential for a fern. Your Plant Profile is key to interpretation.
Q: Do I need a separate hygrometer for every room with plants?
A: Not necessarily. A single reliable digital hygrometer-thermometer can be moved between rooms for periodic audits (e.g., checking each room at the same time of day for three days). For ongoing monitoring in critical zones (e.g., a bathroom housing humidity-sensitive plants, or a dry living room shelf), having dedicated units provides continuous insight. Inexpensive models are sufficiently accurate for plant care purposes. The priority is measuring at the plant’s leaf height during relevant times (e.g., during heating cycles), not the quantity of devices. Start with one quality unit and expand only if your collection or home layout warrants it.
Q: Can air conditioning cause humidity problems for indoor plants?
A: Yes. Central air conditioning systems remove moisture from the air as they cool, which can lower indoor humidity significantly—sometimes below 40%, especially in dry climates or with extended runtime. This may cause stress symptoms similar to winter heating (brown leaf tips, increased spider mites). Conversely, in very humid climates, some AC units may not remove enough moisture, leaving indoor humidity high. Monitor conditions with a hygrometer during cooling season. If AC causes excessive dryness, use pebble trays or a small humidifier near plant groups. If humidity remains too high, ensure adequate airflow (small fan) and avoid overwatering. Position plants away from direct AC airflow to prevent chilling injury.
Q: What is the most budget-friendly way to increase humidity for just one sensitive plant?
A: The most accessible and effective method is a pebble tray. Fill a shallow tray slightly larger than the plant’s pot with pebbles or stones. Add water to just below the pebble tops. Place the plant pot on the pebbles (ensuring drainage holes are not submerged). As water evaporates, it increases humidity immediately around the plant. Refill the tray every 1–3 days as needed. This is low-cost, energy-free, self-regulating (evaporation increases when air is drier/warmer), and avoids the pitfalls of misting. For added effect, group the plant with other humidity-compatible plants nearby to leverage the community effect. Always pair with gentle airflow (e.g., a small fan across the room) to prevent stagnant conditions.
Q: How does seasonality affect my plant care routine beyond humidity?
A: Seasonal shifts influence multiple care factors:
– Light: Day length and sun angle change significantly. Rotate plants for even exposure; supplement with grow lights in winter if needed.
– Watering: Plants typically use less water during shorter, cooler days (fall/winter) and more during active growth periods (spring/summer). Always check soil moisture before watering—don’t follow a rigid schedule.
– Fertilizing: Most plants benefit from reduced or paused fertilization during slower growth periods (late fall/winter). Resume as new growth appears in spring.
– Temperature: Avoid placing plants near drafty windows in winter or in direct AC airflow in summer. Sudden temperature swings cause stress.
– Pests: Spider mites thrive in hot, dry indoor air (common with winter heating); fungus gnats prefer consistently moist soil (more common in cooler, less ventilated conditions). Adjust monitoring and prevention accordingly.
Your quarterly Home Climate Audit helps you adapt proactively to these cyclical changes.
Q: Are there plants that genuinely thrive in typical heated home conditions without extra humidity?
A: Yes. Several resilient species are well-adapted to the moderate to lower humidity (30–50%) and temperature fluctuations common in heated homes: Snake Plant (Dracaena trifasciata), ZZ Plant (Zamioculcas zamiifolia), Pothos (Epipremnum aureum), Chinese Evergreen (Aglaonema), Cast Iron Plant (Aspidistra elatior), and certain Dracaena varieties. These plants typically have thicker leaves, water-storing tissues, or efficient moisture-conserving adaptations. They make excellent choices for beginners, drier rooms (bedrooms, offices), or locations near heat sources where humidity-loving plants would struggle. Always verify specific needs using your Plant Profile approach, as even within these genera, some cultivars may have slightly higher demands.
Conclusion and Next Step
Creating a supportive environment for indoor plants amidst heating and humidity challenges is less about perfection and more about mindful observation and incremental adjustment. The Climate Triad Framework—understanding your Plant Profile, mapping your Home Climate, and integrating solutions within your Human Context—provides a flexible, sustainable path forward. You’ve learned to read environmental cues, implement layered strategies from passive to active, navigate real-world constraints, and troubleshoot nuanced scenarios with confidence.
-
Recap the core:
- Plants communicate through their leaves and growth—learn their language.
- Your home has microclimates; measure where plants live, not just where you stand.
- Solutions work best in layers: relocation, grouping, pebble trays, airflow, and targeted tools.
- Seasonal awareness and quarterly audits prevent recurring issues.
- Safety and household constraints are integral to sustainable success.
-
The 24-Hour Rule: Within the next day, select one small, achievable action aligned with your current situation:
- Place a hygrometer next to your most sensitive plant and note the reading tomorrow.
- Group two humidity-loving plants together on a tray.
- Move one plant away from a direct heat source or drafty window.
- Clean your humidifier tank if you use one.
Small, consistent steps build lasting habits and visible results.
-
The Bigger Perspective: Your home is a living system where human comfort and plant health can coexist thoughtfully. By observing the interplay of light, air, moisture, and temperature, you cultivate not only healthier plants but also a deeper connection to your living space. Progress unfolds over weeks and seasons—celebrate subtle improvements. Each adjustment deepens your understanding. Share observations with fellow plant enthusiasts; collective wisdom enriches the journey. You are not just caring for plants—you are nurturing a responsive, dynamic sanctuary.
Explore Related Guidance:
Understanding Plant Watering Cues | Creating Low-Light Plant Sanctuaries | Seasonal Plant Care Calendar | Non-Toxic Plant Selection Guide | Building a Sustainable Plant Care Routine | Air-Purifying Plants: Science and Selection | Propagation Basics for Home Gardeners