From Foundational Wiring Principles to Adaptable Control Strategies—Design Safe, Intuitive, and Future-Ready Lighting Circuits That Serve Your Home for Decades
Designing a lighting circuit transcends simple wire connections—it’s the deliberate fusion of electrical science, human behavior, and evolving technology. This definitive guide dismantles fragmented online advice to deliver a unified framework for creating circuits that prioritize safety, eliminate compatibility frustrations, and gracefully integrate tomorrow’s innovations. Whether you’re wiring a new addition, modernizing an older home, or strategically adding smart controls, you’ll gain structured, actionable knowledge to make confident, code-aware decisions at every junction. All guidance reflects widely accepted electrical principles; always verify requirements with your local authority having jurisdiction (AHJ), as regulations and practices vary by region and evolve over time.
Introduction
Light transforms space, mood, and function—but the circuitry enabling that transformation operates invisibly until failure strikes. A flickering LED, a warm switch plate, or a smart bulb unresponsive after a power cycle: these are symptoms of foundational mismatches between electrical design and real-world use. True lighting circuit mastery requires seeing beyond individual components to understand how switches, dimmers, smart modules, wiring infrastructure, and human habits interact as a cohesive system. Electrical codes—including the National Electrical Code (NEC) in the United States, the Canadian Electrical Code (CEC), and IEC standards internationally—establish non-negotiable safety boundaries that evolve with technology. A pivotal update came with NEC 2011 (Section 404.2(C)), which mandated a neutral conductor in most switch boxes to accommodate modern electronic controls—a requirement maintained and clarified in subsequent editions. Similarly, energy codes like California’s Title 24 increasingly mandate occupancy sensors in specific zones. This guide synthesizes electrical engineering fundamentals, practical installation insights, and forward-looking adaptability into a single actionable resource. We move deliberately from copper wire to cloud connectivity, ensuring each decision rests on a verified foundation. No prior electrical expertise is assumed—only curiosity and commitment to doing it right, with appropriate professional consultation where needed.
The Adaptive Lighting Framework: Three Interlocking Layers for Lasting Results
Successful lighting circuits aren’t built in a single step. They emerge from three deliberate, sequential layers that prevent costly rework and user frustration. The Foundation Layer establishes electrical safety and physical infrastructure. The Control Layer translates power into intuitive human interaction. The Intelligence Layer adds responsive automation without compromising reliability. Skipping or reversing these layers causes cascading failures: smart devices failing due to missing neutrals (Foundation flaw), dimmers buzzing with incompatible LEDs (Control mismatch), or automations triggering unpredictably (Intelligence overload). This framework ensures every choice reinforces the next. Let’s build systematically.
Layer 1: The Foundation Layer—Electrical Integrity as Non-Negotiable Groundwork
The Foundation Layer determines long-term safety, capacity, and upgrade potential. It exists entirely within walls, boxes, and panels—unseen but indispensable. Compromising here risks fire, shock, or premature component failure. We address universal principles first, then note critical regional variations.
Circuit Capacity: Calculating Load with Precision
Every lighting circuit connects to a dedicated breaker in your main electrical panel, rated for continuous safe current—typically 15 or 20 amps in North American residential settings. Crucially, electrical codes require circuits to operate at no more than 80% of their rated capacity for continuous loads (devices running three hours or longer). This prevents overheating at connections and within wire insulation.
Calculation for 120V systems (North America):
– 15-amp circuit: 15A × 120V × 0.8 = 1,440 watts maximum continuous load
– 20-amp circuit: 20A × 120V × 0.8 = 1,920 watts maximum continuous load
Why the 80% rule matters: A circuit loaded to 100% may not trip the breaker immediately but generates sustained heat at wire terminations and within walls. Over years, this degrades insulation and loosens connections—a documented contributor to electrical faults. The 80% buffer is a critical safety margin embedded in code, not optional overhead.
Practical load assessment:
1. List every fixture on the circuit.
2. Find the actual wattage per bulb (printed on bulb base or packaging—not “equivalent” wattage).
3. Sum all wattages.
Example: A hallway circuit powers:
– 4 recessed LED cans @ 10W each = 40W
– 1 pendant light with 3 bulbs @ 8W each = 24W
– 2 wall sconces @ 7W each = 14W
Total load: 78W—well under 1,440W. This circuit has significant capacity for expansion.
Critical nuance: LED efficiency creates a new consideration. While a single circuit can now support dozens of fixtures, overloading the physical switch box with too many wires becomes the limiting factor (addressed later under Box Fill). Never assume “more capacity = add unlimited fixtures.”
Regional adaptation for 230V systems (UK, EU, Australia):
– Standard lighting circuits often use 6A or 10A breakers.
– 10A circuit @ 230V: 10A × 230V × 0.8 = 1,840 watts
– Always verify requirements with local regulations and qualified professionals, as practices vary significantly by country and municipality. UK ring circuits distribute load differently than North American radial circuits—consult a qualified electrician for modifications.
Wiring Methods: Cable Selection, Conductor Roles, and Code Compliance
Residential lighting circuits primarily use non-metallic (NM) sheathed cable (commonly called Romex® in North America). Understanding cable labeling is essential:
– 14/2 NM: 14-gauge conductors; 2 current-carrying wires (black “hot,” white “neutral”) + bare copper ground. Used for 15-amp circuits.
– 12/2 NM: 12-gauge conductors; same configuration. Required for 20-amp circuits.
– 14/3 or 12/3 NM: Adds a red “traveler” wire. Essential for three-way/four-way switch setups.
Why wire gauge is non-negotiable:
– 14-gauge wire has higher electrical resistance than 12-gauge. On a 20-amp circuit, it can overheat before the breaker trips—a severe fire hazard.
– 12-gauge wire is physically thicker, harder to bend, and costlier but provides safety margin and future flexibility. Many electricians use 12/2 universally for lighting circuits to avoid errors, despite NEC permitting 14/2 on 15A circuits.
– Never mix gauges on a single circuit. All cable segments must match the breaker rating.
Conductor roles demystified:
– Hot (Black/Red): Carries voltage from the panel to the load. Always switched (interrupted) for safety.
– Neutral (White): Completes the circuit back to the panel. Must be continuous and uninterrupted except at the panel bus bar.
– Ground (Bare Copper/Green): Safety path only. Carries current only during a fault, directing it safely to earth to trip the breaker. Never used as a current-carrying conductor.
Critical evolution: The neutral wire requirement at switches
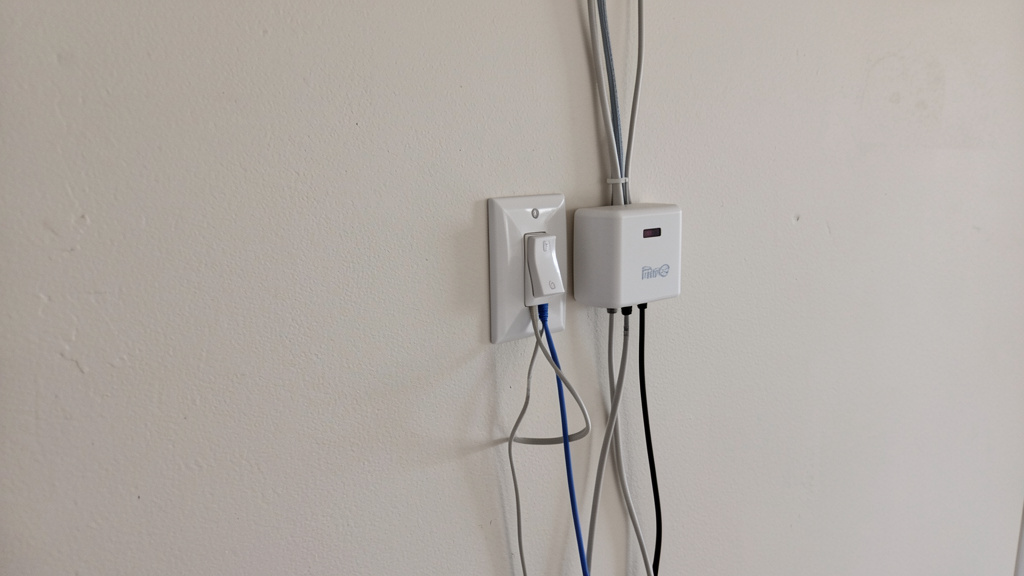
Pre-2011 NEC allowed “switch loops” without a neutral wire—only hot and switched-hot wires entered the switch box. This sufficed for simple mechanical switches but cripples modern electronic controls. The NEC 2011 amendment (Section 404.2(C)) now mandates a neutral conductor in most switch boxes to power smart switches, dimmers, timers, and sensors. Why? These devices need minimal standby power. Without a neutral, they “leak” current through the light fixture, causing LED flicker, ghosting (lights glowing faintly when off), or premature failure. When retrofitting older homes, this is the most common obstacle—and solutions require careful evaluation (detailed later in Friction section).
Safety technology integration:
– AFCI (Arc-Fault Circuit Interrupter): Required by NEC 2017+ for most living areas (bedrooms, living rooms, hallways). Detects dangerous arc faults (loose wires causing sparks) that standard breakers miss. Can be installed as a breaker or outlet.
– GFCI (Ground-Fault Circuit Interrupter): Required in damp locations (garages, unfinished basements, outdoor circuits). Trips at 4-6mA leakage current to prevent shock.
– Note: Some smart switches may interact unexpectedly with AFCI/GFCI breakers. Consult device manuals; solutions include using AFCI outlets downstream or selecting compatible switches. Always verify operation after installation.
Grounding: The Silent Safety Sentinel
Grounding is not optional—it’s the critical fail-safe. Every metal electrical box, switch yoke, dimmer chassis, and light fixture canopy must connect to the grounding system. In plastic boxes, the ground wire attaches directly to the device’s green grounding screw. In metal boxes, the box itself must be grounded first (via a pigtail to the ground bundle), then the device grounds to the box via mounting screws or a separate pigtail.
Real-world consequence: A frayed hot wire contacts a metal light fixture canopy. Without grounding, the entire fixture becomes energized. Touching it while grounded (e.g., standing on a damp floor) completes the circuit through your body—a lethal shock hazard. With proper grounding, fault current surges through the ground wire, tripping the breaker rapidly. Always verify ground continuity with a multimeter during installation. This step is non-negotiable for safety.
Box Fill Calculations: Preventing Overcrowding Hazards
Electrical boxes have finite volume. Overstuffing them with wires, devices, and connectors traps heat, stresses wire insulation, and risks short circuits. Codes specify maximum conductor counts based on box volume (cubic inches) and wire gauge. Ignoring this is a frequent oversight with serious implications.
Step-by-step calculation:
1. Identify box volume: Stamped inside plastic boxes (e.g., “18 cu in”). For metal boxes, reference standard tables.
2. Count conductors:
– Each current-carrying wire (hot, neutral, traveler) entering the box = 1 unit
– All equipment grounding conductors (grounds) together = 1 unit
– Each cable clamp (where cable enters box) = 1 unit
– Each switch, dimmer, or receptacle = 2 units
3. Determine unit volume: Based on largest wire gauge in box:
– 14-gauge wire = 2.00 cu in per unit
– 12-gauge wire = 2.25 cu in per unit
4. Calculate required volume: Total units × unit volume
5. Compare: Required volume ≤ Box volume = Compliant
Example: Single-gang plastic box (18 cu in) with standard single-pole switch
– Wires: 14/2 cable entering (black, white, ground) = 3 conductors
– Grounds: All grounds count as 1 unit
– Device: 1 switch = 2 units
– Cable clamp: 1 unit
– Total units: 3 + 1 + 2 + 1 = 7 units
– Required volume: 7 units × 2.00 cu in (for 14-gauge) = 14.0 cu in
– Box volume: 18 cu in → Compliant (18 > 14)
Smart switch complication: Smart switches are bulkier. Adding a neutral wire (common in retrofits) increases conductor count. Same box with smart switch requiring neutral:
– Wires: 14/3 cable (black, red, white, ground) = 4 conductors
– Grounds: 1 unit
– Device: 1 smart switch = 2 units
– Cable clamp: 1 unit
– Total units: 4 + 1 + 2 + 1 = 8 units
– Required volume: 8 × 2.00 = 16.0 cu in → Still compliant in 18 cu in box
– But: Add a second cable for a three-way setup? Units jump to 10+ → Requires deep single-gang (22+ cu in) or double-gang box.
Pro solution: When upgrading to smart controls or adding devices, replace standard boxes with “deep” or “extra-deep” versions. They cost slightly more but prevent dangerous cramming and simplify installation. For multi-gang boxes controlling multiple circuits, calculate fill for the entire assembly.
The Fundamental Principle of the Foundation Layer: Safety is engineered before the first wire is stripped—through precise load management, correct conductor selection, unwavering grounding, and respectful box occupancy. No control layer elegance can compensate for a compromised foundation.
Layer 2: The Control Layer—Human-Centered Interaction Design
With infrastructure secured, we design how people experience light. The Control Layer transforms electrical potential into intuitive action: flipping a switch in total darkness, smoothly dimming for movie night, or triggering a scene with one touch. Poor control design causes daily friction—hunting for switches, inconsistent dimming, or confusing multi-location setups. Excellence here requires matching technology to behavior, bulb physics, and spatial context.
Single-Pole Switches: Simplicity Perfected
The single-pole switch remains the workhorse of residential lighting. It controls one light (or group) from one location by interrupting the hot wire. Wiring is straightforward: hot wire to brass/dark screw, switched-hot to silver/light screw, ground to green screw.
When it shines: Closets, pantries, small bathrooms, single-entry bedrooms—any space with one logical control point.
Installation precision:
– Always verify power is OFF with a non-contact voltage tester before touching wires.
– Connect the incoming hot (from panel) to the common terminal (often marked “LINE” or darker screw).
– Connect the switched-hot (to light) to the load terminal (“LOAD” or lighter screw).
– Critical safety note: Reversing LINE and LOAD leaves the light fixture energized even when switched off—a shock hazard during bulb changes. Test after installation: with switch OFF, the fixture wires should show no voltage.
Modern refinement: “Illuminated” switches have a tiny pilot light. Useful in dark rooms but can cause LED ghosting. Choose models with isolated pilot circuits or use non-illuminated versions with glow-in-the-dark toggle caps.
Three-Way and Four-Way Switches: Multi-Location Mastery
Three-way switches enable control from two locations (e.g., top/bottom of stairs, room entrances). Four-way switches extend control to three or more locations. Despite naming, three-way switches have three terminals (plus ground); four-way switches have four terminals.
How the circuit flows:
1. Power enters the first three-way switch. Common terminal connects to hot.
2. Two traveler wires (typically black and red in 14/3 cable) run between switches.
3. At the second three-way switch, travelers connect to its traveler terminals; common terminal runs to the light fixture.
4. For a third location: Install a four-way switch between the two three-ways. Its four terminals cross-connect the two traveler pairs. Flipping it reverses the circuit path.
Wiring clarity: Traveler wires are functionally interchangeable—no “correct” assignment between the two traveler screws on a three-way switch. Label them with colored tape during installation to avoid confusion. The common terminal is critical: it’s usually a different color (black or copper) and connects to either hot (first switch) or load (last switch).
Common pitfalls:
– Using 14/2 cable instead of 14/3 between switches → missing traveler wire.
– Misidentifying the common terminal → circuit only works when one switch is in a specific position.
– Forgetting the ground wire on metal switches → safety hazard.
Modern alternative: Smart switches eliminate traveler complexity. Replace the primary switch with a smart switch (requiring neutral), cap the traveler wires in all boxes, and install wireless battery-powered remotes at secondary locations. Brands like Lutron Caséta, TP-Link Kasa, and GE Enbrighten offer dedicated kits. Benefits:
– No rewiring existing walls
– Remotes mount anywhere (adhesive backing)
– Remotes can control multiple lights/scenes
– Ideal for retrofitting older homes with inaccessible wiring
Dimmer Switches: The Physics of Light Reduction
Dimmers don’t “reduce voltage” simply—they modify the AC sine wave delivered to the bulb. Understanding this explains compatibility issues.
Technology deep dive:
– Leading-Edge (TRIAC) Dimmers: Cut the front (leading edge) of the AC wave. Designed for resistive loads like incandescent/halogen bulbs. Inexpensive but may cause audible buzz, flicker, or limited range with LEDs. Minimum load typically 25-40W—problematic for low-wattage LEDs.
– Trailing-Edge (ELV) Dimmers: Cut the rear (trailing edge) of the wave. Smoother, quieter operation. Better suited for capacitive loads like LED drivers and electronic low-voltage (ELV) transformers. Lower minimum load (often 5-15W), essential for single LED bulbs.
– Universal/Adaptive Dimmers: Auto-detect load type or offer selectable modes via dip switches/app. Best for mixed-bulb circuits or future-proofing. Examples: Lutron Diva DVCL-153P, Leviton DSM10.
Compatibility is a three-legged stool:
1. Dimmer must support bulb technology (LED, CFL, incandescent).
2. Bulb must be labeled “dimmable” (non-dimmable LEDs fail prematurely with dimmers).
3. Total circuit wattage must meet dimmer’s minimum AND maximum ratings.
Real-world troubleshooting scenario:
A homeowner installs a trailing-edge dimmer for six LED recessed lights (9W each, total 54W). At low settings, lights flicker erratically. Verification steps:
– Dimmer specs: Min load 10W, max 150W LED → 54W is within range.
– Bulbs: Packaging says “dimmable.”
– Root cause: The specific LED driver model isn’t on the dimmer manufacturer’s compatibility list. Replacing one bulb with a brand/model verified compatible (e.g., Philips Warm Glow LED) resolves the issue.
Lesson: “Dimmable” is necessary but insufficient. Consult the dimmer maker’s online compatibility tool (e.g., Lutron LED Advisor Tool) before purchasing bulbs or dimmer.
Advanced dimming nuance:
– Dimming range: Some LEDs may only dim to 20% brightness before cutting out. High-CRI (Color Rendering Index >90), dimmable LEDs from reputable brands often achieve wider ranges with quality dimmers.
– Flicker considerations: Imperceptible flicker may contribute to eye strain. Quality dimmers/bulbs operate at higher frequencies. Look for references to IEEE PAR1789 compliance in product documentation.
– Buzz mitigation: Ensure dimmer isn’t overloaded. Use ferrite cores on fixture wires. Select dimmers with “soft start” features.
Specialty Controls: Timers, Sensors, and Scene Selectors
Beyond basic on/off/dim, specialized controls add automation and accessibility:
– Digital Timer Switches: Set precise on/off durations (e.g., 5, 15, 30 minutes). Ideal for closets, pantries, workshops. Look for models with manual override.
– Occupancy vs. Vacancy Sensors:
– Occupancy: Turns lights ON automatically when motion detected; OFF after timeout. Best for garages, laundry rooms.
– Vacancy: Requires manual ON; turns OFF automatically. Preferred for offices, bathrooms (avoids startling someone).
– Placement tip: Mount sensors 6.5–8 ft high. Avoid aiming at HVAC vents, windows (sunlight triggers), or high-traffic corridors outside the room. Adjust sensitivity and timeout via dip switches.
– Multi-Location Scene Selectors: Wall-mounted panels with buttons for preset scenes (e.g., “Relax,” “Entertain,” “Clean”). Often part of wired systems like Lutron HomeWorks but available in standalone versions (Lutron Maestro). No app needed—ideal for guests or tech-averse users.
The Control Layer Decision Tree: Your Selection Compass
Use this flow to eliminate guesswork:
1. How many control locations?
– One → Single-pole switch
– Two → Three-way switches or smart switch + wireless remote
– Three+ → Four-way switches or smart switch + multiple remotes
2. Is dimming desired?
– Yes → Identify bulb types. Choose trailing-edge/universal dimmer. Verify compatibility before purchase. Confirm total wattage meets min/max specs.
– No → Standard switch or sensor
3. Special requirements?
– Auto shut-off → Timer or vacancy sensor
– Preset ambiance → Scene selector or smart system
– Accessibility needs → Rocker switches (larger surface), motion sensors, voice control integration
The Fundamental Principle of the Control Layer: The most elegant circuit is the one users operate without conscious thought—where switches reside exactly where hands reach in darkness, dimming feels natural, and controls align with how space is actually used.
Layer 3: The Intelligence Layer—Strategic Integration of Smart Controls
The Intelligence Layer adds connectivity, automation, and remote management. Done well, it feels invisible—lights adapt seamlessly to time, presence, or preference. Done poorly, it introduces fragility, complexity, and privacy concerns. This layer must enhance, not replace, the Foundation and Control Layers. A smart switch still requires proper wiring; an automation must respect human override.
Smart Switch vs. Smart Bulb: Resolving the Core Dilemma
This choice defines your system’s architecture. Neither is universally superior—context determines the winner.
| Decision Factor | Smart Switch | Smart Bulb |
|---|---|---|
| Installation | Requires wiring access; neutral usually needed | Screw-in replacement; no wiring changes |
| Physical Switch Dependency | Wall switch remains functional; controls entire fixture | Wall switch must stay ON; flipping it off disables smart features |
| Fixture Control | Controls all bulbs in fixture uniformly | Controls individual bulbs; ideal for multi-bulb lamps |
| Reliability | Depends on home network stability; local control options vary | Same network dependency; bulb failure = loss of smart function |
| Cost Efficiency | Higher upfront per switch; controls multiple bulbs cost-effectively | Lower per bulb; cost escalates rapidly in multi-bulb fixtures |
| Renter-Friendly | Usually requires landlord permission; leaves permanent change | Fully reversible; take bulbs when moving |
| Best Application | Ceiling fixtures, hallways, whole-room control | Table lamps, accent lighting, temporary setups, rentals |
Critical insight on switch dependency: Smart bulbs require constant power. If a household member flips the wall switch off (e.g., “saving energy”), the bulb loses connectivity. Solutions:
– Install switch guards or covers (physical blockers)
– Use smart switches with “power loss memory” (returns to last state)
– Educate all users—but human habit is hard to change
– Superior solution: Replace the wall switch with a smart switch and use standard bulbs. This preserves wall control while enabling app/voice automation.
Hybrid strategy for balanced results:
– Use smart switches for primary room lighting (ceiling fixtures, recessed cans)
– Use smart bulbs for accent lamps where color tuning or individual control adds value
– Use smart plugs for floor lamps in hard-to-wire locations
This approach maximizes reliability where it matters most while adding flexibility where beneficial.
Communication Protocols: Choosing Your Ecosystem’s Language
Smart devices “speak” using wireless protocols. Protocol choice impacts reliability, range, scalability, and long-term viability.
- Wi-Fi (Direct):
- How it works: Device connects directly to home router.
- Pros: No hub needed; simple initial setup; uses existing network.
- Cons: Congests Wi-Fi bandwidth; less reliable with many devices; higher power draw; vulnerable to router outages.
-
Best for: 1-3 devices; renters; minimal setups. Avoid for whole-home systems.
-
Zigbee (2.4 GHz):
- How it works: Low-power mesh network. Devices relay signals to extend range. Requires hub (e.g., Philips Hue Bridge, Samsung SmartThings).
- Pros: Robust mesh; low power; dedicated channel reduces Wi-Fi interference; mature ecosystem.
- Cons: Hub required; potential interference from dense Wi-Fi environments; setup complexity.
-
Best for: Philips Hue users; SmartThings ecosystems; medium/large installations.
-
Z-Wave (Sub-1 GHz):
- How it works: Mesh network on lower frequency band (908.42 MHz in US). Requires hub (e.g., Hubitat, Home Assistant).
- Pros: Longer range per hop; minimal interference from Wi-Fi; strong security frameworks; excellent for large homes.
- Cons: Hub required; slower data rates; fewer consumer devices than Zigbee.
-
Best for: Security-focused users; large properties; integration with Z-Wave sensors/locks.
-
Matter (Over Thread or Wi-Fi):
- How it works: Universal standard (backed by Apple, Google, Amazon, CSA). Runs over Thread (IP-based mesh) or Wi-Fi. Requires Matter-compatible hub (e.g., Apple TV 4K, Echo 4th Gen+, HomePod).
- Pros: Cross-ecosystem compatibility (Apple Home, Google Home, Alexa); simplified setup (QR code); local execution for speed/reliability; future-proof.
- Cons: Still rolling out; requires newer devices/hubs; Thread needs border routers.
- Best for: New installations; users invested in multiple ecosystems; long-term planning.
Protocol selection strategy:
1. For new builds/renovations: Prioritize Matter-over-Thread devices. Install Thread border routers (e.g., Apple TV, Echo) in central locations. This is the most sustainable path.
2. For existing smart homes: Stick with your current protocol (Zigbee/Z-Wave) for expansion. Avoid mixing protocols unnecessarily—complexity multiplies.
3. Avoid “protocol hopping”: Devices are protocol-locked. Plan purchases within your chosen ecosystem.
Hub-Based vs. Hubless Systems: Centralized Intelligence
- Hubless (Wi-Fi Direct): Each device connects independently to Wi-Fi. Simple for beginners but becomes unstable beyond 5-10 devices. Router overload causes lag or disconnections. Limited automation capabilities.
- Hub-Based: Devices connect to a dedicated hub, which interfaces with your network and cloud. Benefits:
- Local processing: Automations run on the hub (e.g., “If motion sensor triggers after sunset, turn on lights”) without cloud dependency—faster and works during internet outages.
- Unified management: One app controls all devices.
- Advanced rules: Create complex scenes (“Goodnight” turns off lights, locks doors, adjusts thermostat).
- Security: Hub can isolate IoT traffic from main network.
Recommendation: For any serious smart lighting system (5+ devices), invest in a capable hub. Hubitat Elevation and Home Assistant offer powerful local control; Samsung SmartThings balances cloud/local features.
Retrofitting Smart Controls: Navigating Real-World Constraints
Integrating intelligence into existing homes presents unique challenges. Solutions require honesty about limitations.
Scenario 1: No neutral wire in switch box
– Best solution: Run new 14/3 cable from light fixture to switch box to add neutral. Requires wall access—ideal during renovations. Most code-compliant and versatile long-term.
– Practical solution: Use a “no-neutral” smart switch (e.g., Lutron Caséta PD-6ANS, GE Enbrighten Z-Wave Plus No-Neutral). These use capacitive coupling to draw minimal power through the light fixture. Critical caveats:
– Verify compatibility with your specific LED bulbs—ghosting/flicker is common with incompatible pairs.
– May not support very low-wattage loads (e.g., single 5W bulb).
– Not permitted by all local codes; check with authority having jurisdiction (AHJ).
– Workaround: Install smart bulbs and leave switch ON, using a switch cover. Only suitable for lamps or single-bulb fixtures.
Scenario 2: Three-way circuit retrofit
– Recommended approach: Replace the primary switch (where power enters) with a smart switch requiring neutral. Cap the traveler wires in all boxes. Install wireless remotes (battery-powered) at secondary locations. Follow manufacturer’s specific wiring diagram—never assume.
– Advanced option: Install a smart relay inside the light fixture’s junction box (e.g., Shelly 1PM, Inovelli Blue Series). The existing switches become simple momentary triggers (wired to the relay’s input). Preserves all wall switch locations but requires fixture access and electrical skill.
– Avoid: Trying to wire a standard smart switch into a three-way circuit without modifying the setup. It rarely works reliably.
Scenario 3: Overcrowded switch box
Smart switches are deeper than standard switches. Before purchasing:
1. Turn off power.
2. Remove existing switch.
3. Measure box depth with a ruler.
4. Compare to smart switch specifications (depth + required clearance).
If insufficient: Replace box with a deep single-gang (22+ cu in) or convert to double-gang using a remodeling bracket. This small effort prevents dangerous wire stress and ensures proper heat dissipation.
Automation Scenarios: Purposeful Intelligence
Automation should solve real problems, not add complexity. Start small and expand intentionally.
- Sunset/Sunrise Scheduling:
- Setup: Porch light turns on at sunset, off at 11 PM.
- Why it works: Adjusts automatically for seasonal daylight changes. Uses geolocation—no manual time adjustments.
-
Pro tip: Add a “sunset offset” (e.g., “turn on 15 minutes after sunset”) to avoid premature activation on cloudy days.
-
Motion-Activated Pathways:
- Setup: Hallway lights fade on to 30% brightness when motion detected between 10 PM–6 AM; fade off after 2 minutes.
- Why it works: Provides safe navigation without blinding brightness. Uses time AND motion conditions to avoid daytime triggering.
-
Critical refinement: Set motion sensor to “vacancy” mode (requires manual on during day) to prevent lights turning on unexpectedly when cleaning.
-
Scene Integration:
- Setup: “Movie Time” scene: Dim living room lights to 15%, turn off overheads, activate bias lighting behind TV. Triggered by voice command or single button press.
- Why it works: Replaces multiple manual actions with one intuitive command. Reduces friction for daily routines.
-
Human-centered design: Include a physical button (smart switch scene button or remote) alongside voice/app triggers. Not everyone wants to speak to a device.
-
Vacation Mode:
- Setup: Randomly turn on/off selected lights between 6–11 PM. Vary timing and duration daily.
- Why it works: Simulates occupancy more convincingly than fixed schedules. Deters potential intruders.
- Security note: Never broadcast vacation status on social media. Use discreet automations.
Privacy and Security: Non-Negotiable Safeguards
Smart devices collect data. Mitigate risks proactively:
– Network segmentation: Create a separate Wi-Fi network (SSID) for IoT devices. Most modern routers support “Guest Network” isolation. Prevents a compromised bulb from accessing computers/phones.
– Firmware hygiene: Enable automatic updates. If unavailable, check manufacturer portals quarterly. Critical security patches are often released silently.
– Account security: Use strong, unique passwords for smart home accounts. Enable two-factor authentication (2FA) wherever offered.
– Data awareness: Review privacy policies. Does the manufacturer sell anonymized usage data? Can you opt out? Prefer companies with transparent data practices.
– Physical disconnect: For ultimate privacy, install smart switches with manual override toggles. Flip the physical switch off to disable connectivity completely.
The Fundamental Principle of the Intelligence Layer: Technology should recede into the background—anticipating needs without demanding attention, enhancing safety without introducing vulnerability, and empowering choice without creating dependency.
Navigating Common Frictions and Alternative Solutions
Even meticulous planning encounters real-world constraints. This section provides code-aware, practical resolutions to frequent pain points—prioritizing safety without sacrificing functionality.
Friction 1: “My Switch Box Has No Neutral Wire”
This is a common obstacle in older homes. Solutions ranked by safety and longevity:
- Run new cable with neutral (Gold Standard):
- Fish 14/3 NM cable from the light fixture junction box to the switch box.
- Connect white wires to neutral bundle in both boxes.
- Advantage: Fully code-compliant; supports any future electronic control.
-
Challenge: Requires wall access; best during renovations. Hire an electrician if uncomfortable fishing wires.
-
Install a no-neutral smart switch (Practical Compromise):
- Select models explicitly designed for no-neutral installations (Lutron Caséta, GE Enbrighten No-Neutral).
- Critical pre-installation step: Test with your exact LED bulbs. Many cause ghosting/flicker. Consult manufacturer compatibility lists.
- Limitation: May not work with very low-wattage loads (<10W total). Add a “dummy load” resistor (e.g., Lutron LUT-MLC) if permitted by code and manufacturer.
-
Safety note: These switches leak micro-current through the fixture. Ensure bulbs are rated for this (most modern dimmable LEDs are).
-
Smart bulb + switch cover (Limited Application):
- Install smart bulbs. Place a plastic switch guard over the wall switch to prevent accidental shutoff.
- Only suitable for: Lamps, single-bulb fixtures where switch location is obvious.
-
Avoid for: Ceiling fixtures controlled by multiple switches—creates confusion.
-
Neutral wire adapter kits (Use with Extreme Caution):
- Devices like Aeotec Neutral Add-On claim to “create” a neutral path.
- Strong caution: Many electricians and inspectors consider these non-compliant with NEC 404.2(C). They can overload ground paths or create shock hazards.
- Recommendation: Avoid unless explicitly approved by your local building department. Safety must outweigh convenience.
Universal rule: Never use the ground wire as a neutral substitute. This violates electrical code globally and creates a lethal shock risk by energizing all grounded metal parts (boxes, fixtures, appliance chassis).
Friction 2: “My Dimmer and LED Bulbs Are Incompatible”
Symptoms: Flickering, buzzing, limited dimming range, lights not turning off completely (“ghosting”).
Systematic troubleshooting protocol:
1. Verify basics:
– Dimmer is rated for LED loads.
– Bulbs are explicitly labeled “dimmable” (non-dimmable LEDs will fail).
– Total wattage is within dimmer’s min/max range (e.g., 10W–150W).
2. Consult compatibility databases:
– Use Lutron’s LED Advisor Tool, Leviton’s Compatibility Finder, or manufacturer PDF lists. Search by exact bulb model number.
– Replace bulbs or dimmer to match a verified pair.
3. Address ghosting (lights glow when off):
– Cause: Tiny current leakage through electronic switch powering itself.
– Solution A: Install a bypass capacitor (e.g., Lutron LUT-MLC) across the fixture wires. Provides a path for leakage current.
– Solution B: Replace with a dimmer designed for low-wattage LEDs (e.g., Lutron DV-600P).
– Solution C: Ensure a proper neutral connection exists at the switch.
4. Address flickering/buzzing:
– Cause: Mismatch between dimmer waveform and LED driver electronics.
– Solution A: Replace bulbs with high-quality, dimmable LEDs from brands known for compatibility (Philips, Cree, GE).
– Solution B: Upgrade to a universal/adaptive dimmer with selectable modes.
– Solution C: Add a ferrite core noise suppressor to the fixture wires.
5. Last resort:
– If all else fails, replace the dimmer with a standard switch and use smart bulbs only if the wall switch can remain permanently on (with guard).
Prevention strategy: When purchasing new fixtures or bulbs, buy one sample first. Test with your dimmer at all brightness levels before committing to a full-room install.
Friction 3: “I Have a Three-Way Circuit but Want Smart Control”
Traditional three-way wiring conflicts with most smart switches. Solutions:
- Smart switch + wireless remotes (Recommended):
- Replace the switch where power enters (line side) with a smart switch requiring neutral.
- Cap the traveler wires in all switch boxes with wire nuts.
- Install battery-powered wireless remotes (matching the smart switch ecosystem) at other locations.
- Benefits: Preserves all control locations; no rewiring travelers; remotes mount anywhere.
-
Brands: Lutron Caséta (PD-6ANS + Pico remotes), TP-Link Kasa (KS225 + KP400 remotes).
-
Smart relay at fixture (Advanced):
- Install a smart relay module (e.g., Shelly 1PM, Inovelli Red Series) inside the light fixture’s junction box.
- Rewire existing switches as momentary triggers (press to toggle) connected to the relay’s input terminals.
- Benefits: All physical switches remain functional; no neutral needed at switches.
-
Challenges: Requires fixture access; complex wiring; not DIY-friendly for beginners.
-
Avoid: Attempting to wire a standard smart switch into the three-way circuit without capping travelers. Results are unpredictable and often unsafe.
Friction 4: “Mixed Bulb Types on One Dimmer”
Incandescents, halogens, CFLs, and LEDs have fundamentally different electrical characteristics. Dimming them together is strongly discouraged.
Why it fails:
– Incandescents draw high current when cold; LEDs draw minimal current.
– Dimmer electronics calibrate to the dominant load type. Mixed loads cause erratic behavior.
– CFLs often hum or fail prematurely when dimmed below 20%.
Solutions:
– Ideal: Dedicate circuits or dimmers to one bulb technology. Replace all bulbs on the circuit to match.
– Temporary compromise: Use a universal dimmer with wide compatibility range. Test extensively at all dimming levels. Monitor for overheating.
– Fixture-level fix: For multi-socket fixtures (chandeliers), replace all bulbs with identical dimmable LED models. Consistency is key.
Alternative Control Philosophies: When Simpler Is Smarter
Smart technology isn’t always the answer. Consider these human-centered alternatives:
- Layered Manual Control:
- Wire ambient ceiling lights and task under-cabinet lights on separate circuits.
- Install independent dimmers for each layer.
-
Result: Achieve nuanced ambiance (e.g., bright task lighting with dim ambient) without apps or automations. Empowers intuitive, immediate control.
-
Passive Scene Setting:
- Use multi-gang switch plates with clearly labeled toggles (e.g., “Ambient,” “Task,” “Accent”).
- Pair with high-CRI bulbs at varying color temperatures (2700K ambient, 3000K task).
-
Result: One glance shows control options; no learning curve. Ideal for kitchens, home offices.
-
Hybrid Intelligence:
- Smart switch for main overhead light (reliable whole-room control).
- Smart plug for a floor lamp (easy color tuning for mood).
- Result: Balances robustness with flexibility. Minimizes points of failure.
Your Questions, Answered
Q: How do I calculate if my circuit can handle adding four new recessed LED lights?
A: First, identify the circuit breaker controlling the existing lights and note its amperage (15A or 20A). Turn off all other devices on that circuit. Sum the wattage of all current lights on the circuit. Add the wattage of the four new lights (check bulb specs—e.g., 10W each = 40W total). Ensure the new total does not exceed 80% of circuit capacity (1,440W for 15A/120V; 1,920W for 20A/120V). Example: Existing load = 200W; new lights = 40W; total = 240W << 1,440W → Safe to add. If near capacity, consult an electrician to assess panel load and wire gauge before proceeding.
Q: Can I mix LED and incandescent bulbs on the same dimmer circuit?
A: Strongly discouraged. Incandescents are resistive loads; LEDs are electronic loads with drivers. A dimmer calibrated for incandescents will cause LEDs to flicker, buzz, or cut out prematurely. Even “universal” dimmers struggle with mixed loads. Best practice: Standardize all bulbs on the circuit to one dimmable technology. If temporarily unavoidable, use a high-quality universal dimmer, test extensively at all levels, and plan to replace bulbs to match within 6 months.
Q: What’s the functional difference between a standard dimmer and a smart dimmer?
A: Electrically, both modulate power to the light source. The critical differences:
– Standard dimmer: Manual control only (knob/slider). No connectivity. Requires neutral only if specified (older models may not).
– Smart dimmer: Adds wireless radio (Wi-Fi/Zigbee/Z-Wave), microprocessor, and often a neutral connection to power electronics. Enables app control, voice commands, scheduling, and integration with other smart devices. Most require a neutral wire; verify before purchase. Smart dimmers also often include features like fade rates, preset scenes, and usage monitoring.
Q: Why do my LED lights glow faintly when the switch is off, and how do I fix it?
A: This “ghosting” occurs when a tiny current leaks through the circuit, often due to:
1. A smart switch/dimmer without a neutral “stealing” power through the LED driver.
2. Induced voltage from wires running parallel to other live cables in the wall.
3. An illuminated switch with a pilot light completing a circuit.
Solutions:
– Install a bypass capacitor (e.g., Lutron LUT-MLC) across the fixture wires—provides a path for leakage current.
– Replace the switch with a model designed for low-wattage LEDs or one requiring a neutral.
– Ensure all grounds are properly connected; poor grounding can exacerbate ghosting.
– Safety first: Verify wiring is correct with a multimeter. If unsure, consult an electrician—ghosting can sometimes indicate a more serious wiring fault.
Q: Is it safe for a confident DIYer to install a smart switch?
A: Safety depends on three factors:
1. Wiring clarity: Can you confidently identify line (hot), load (to light), neutral, and ground wires? If wires are unmarked or colors are non-standard (common in older homes), stop and consult a professional.
2. Box conditions: Is the box deep enough? Are connections tight? Is there space for the larger smart switch? Overcrowding creates fire risk.
3. Local regulations: Some jurisdictions require permits for electrical modifications or mandate licensed electrician work. Check with your local building department.
If all three are “yes,” proceed cautiously: Turn off power at the breaker, verify with a voltage tester, follow the manufacturer’s wiring diagram precisely, and test thoroughly. When in doubt, hire a licensed electrician—electrical mistakes carry severe consequences.
Q: What do energy codes like California Title 24 require for residential lighting controls?
A: The NEC focuses on electrical safety; energy codes like Title 24 (California), IECC (International Energy Conservation Code), or local amendments drive control requirements. Common mandates:
– Occupancy/vacancy sensors required in bathrooms, garages, laundry rooms, and storage areas.
– Daylighting controls (photosensors) required in rooms with significant window area.
– Manual-on vacancy sensors preferred over auto-on occupancy sensors in offices to save energy.
– Dimming capability required for >50% of connected lighting load in certain spaces.
Critical: Requirements vary significantly by location and building type (new vs. remodel). Always consult your local building department or a qualified lighting designer before finalizing plans. Never assume national standards apply locally.
Q: How do I choose between Zigbee and Z-Wave for a new smart lighting system?
A: Both are robust mesh protocols. Decision factors:
– Existing ecosystem: Do you own Philips Hue bulbs (Zigbee) or a SmartThings hub (supports both)? Extend your current system.
– Home size/layout: Z-Wave’s sub-1GHz frequency penetrates walls better—advantageous for large or dense homes.
– Device selection: Zigbee has broader bulb/fixture support; Z-Wave excels in sensors/locks.
– Future-proofing: Prioritize Matter compatibility. Many new Zigbee/Z-Wave devices are Matter-upgradable.
Practical advice: For most new installations, select a Matter-over-Thread hub (e.g., Apple TV 4K) and choose Thread-enabled devices. This provides the smoothest path to cross-ecosystem compatibility and avoids protocol lock-in.
Q: Can I use a standard dimmer switch to control a ceiling fan light kit?
A: Only if the dimmer is explicitly rated for both lighting and fan loads. Standard dimmers control resistive/incandescent loads and can damage fan motors, causing overheating, humming, or failure. Solutions:
– Use a fan speed control (designed for motor loads) for the fan, and a separate dimmer for the light kit (if wired independently).
– Install a combination fan/light control (e.g., Lutron Maestro MACL-FM) designed to handle both loads on separate circuits within the same device.
– Critical: Verify the fan’s wiring—many modern fans have separate wires for fan and light (typically black for fan, blue for light). Never connect a dimmer to the fan motor wire.
Q: What should I do if a wall switch feels warm or hot to the touch?
A: Turn off the circuit breaker immediately. A warm switch indicates:
– Loose wire connections (most common)—arcing generates heat.
– Overloaded circuit—total wattage exceeds switch/dimmer rating.
– Internal component failure.
Do not use the switch. After power is off:
1. Remove the switch plate and inspect for burnt/melted wires or discoloration.
2. Tighten all terminal screws securely (wires should not pull out easily).
3. Verify total circuit load is within switch rating (e.g., dimmer max 600W).
4. Replace the switch with a new, properly rated device.
If damage is visible, wiring is unclear, or the issue recurs, contact a licensed electrician. Heat is a precursor to fire—treat it with urgency.
Q: How critical is it to update smart device firmware, and how often?
A: Firmware updates are essential for three reasons:
1. Security patches: Close vulnerabilities hackers exploit.
2. Bug fixes: Resolve connectivity or compatibility issues.
3. New features: Add functionality or improve performance.
Best practices:
– Enable automatic updates if the device/app supports it.
– If manual, check quarterly (set a calendar reminder).
– Prioritize updates for devices with known security advisories.
– Before updating, ensure the device is powered and connected stably to avoid “bricking.”
Neglecting updates leaves your network exposed—treat firmware hygiene like essential maintenance.
Q: Are smart lighting systems vulnerable to hacking, and how can I mitigate risks?
A: Any internet-connected device carries some risk, but prudent measures drastically reduce exposure:
– Network segmentation: Place all IoT devices on a separate Wi-Fi network (guest network) isolated from computers/phones.
– Strong credentials: Use unique, complex passwords for smart home accounts; enable two-factor authentication (2FA).
– Firmware discipline: Keep all devices updated.
– Minimal permissions: Only grant necessary app permissions (e.g., location access for sunset triggers is valid; contact access is not).
– Brand vetting: Choose manufacturers with transparent security practices and a history of timely updates.
The convenience and safety benefits of well-implemented smart lighting far outweigh risks when basic digital hygiene is practiced.
Q: What’s the most cost-effective way to begin smart lighting without regretting choices later?
A: Start with one high-impact, low-risk project:
– For homeowners: Replace the switch controlling your main living area light with a Matter-compatible smart switch. Add one wireless remote for a secondary location. This establishes a reliable core.
– For renters: Install two smart bulbs in a frequently used lamp. Use the included bridge for local control.
– Universal rule: Avoid ultra-cheap, no-name brands. They often lack updates, compatibility, and security. Invest in reputable ecosystems with clear expansion paths. Document your setup (photos of wiring, model numbers) for future reference. This small, intentional start builds confidence and avoids costly missteps.
Conclusion and Next Step
Lighting circuit design is a profound act of stewardship—shaping how light serves your home for decades. By embracing the Adaptive Lighting Framework, you’ve moved beyond fragmented tips to a holistic understanding where safety, usability, and adaptability intertwine. The Foundation Layer ensures your circuit will protect your home long after trends fade. The Control Layer guarantees that interacting with light feels intuitive, not frustrating. The Intelligence Layer, when applied judiciously, adds quiet convenience without fragility. This layered approach transforms electrical work from a chore into a deliberate craft grounded in verified principles.
The 24-Hour Rule
Within the next day, take one tangible, low-stakes action that builds momentum:
– If planning new work: Sketch a simple diagram of one room. Mark light fixture locations, switch positions, and estimated bulb wattages. Calculate the total load.
– If troubleshooting existing lights: Identify one problematic switch or dimmer. Look up its model number online and find the manufacturer’s compatibility list for LED bulbs. Bookmark it.
– If exploring smart options: Choose one light you’d genuinely like to automate (e.g., porch light at dusk). Research two specific smart switch models that match your wiring constraints (neutral available? three-way?). Note their protocol (Matter preferred).
This micro-step bridges knowledge and action without overwhelm. Progress compounds.
The Big Picture
Your lighting circuit is not an isolated project—it’s a node in your home’s evolving ecosystem. As LED technology advances, protocols unify under Matter, and energy codes evolve, the principles in this guide remain your anchor. You now possess the framework to evaluate new products critically, communicate effectively with electricians, and make upgrades with confidence. Whether you install every wire yourself or guide a professional team, this knowledge ensures your lighting enhances safety, comfort, and joy for years to come. Light well.
Explore Our Complete System:
[The Homeowner’s Guide to Electrical Safety and Code Compliance] | [DIY Wiring Projects: From Switches to Outlets] | [Smart Home Integration: A Room-by-Room Strategy] | [Energy-Efficient Lighting: Bulb Science and Behavioral Design] | [Troubleshooting Common Home Electrical Issues] | [Understanding Your Electrical Panel: Breakers, Circuits, and Capacity] | [Outdoor Lighting Circuits: Safety, Design, and Automation]