Design a resilient, efficient, and code-compliant electrical system with confidence—whether you’re renovating, expanding, or deepening your understanding of the infrastructure that powers daily life.
Every time you flip a switch, plug in a device, or rely on climate control, you engage with a carefully engineered system designed for safety and reliability. Beneath your walls lies an electrical ecosystem where thoughtful planning prevents hazards, supports modern demands, and adapts to future needs. Circuit planning—the intentional process of evaluating loads, selecting protection devices, mapping circuits, and embedding safety protocols—is foundational stewardship. This guide translates National Electrical Code (NEC) principles into accessible frameworks, clarifies real-world decision points, and empowers informed dialogue with qualified professionals. Critical reminder: Electricity requires respect. Always consult a licensed electrician for installations, modifications, or uncertainty. Local codes supersede general guidance; your authority having jurisdiction (AHJ) holds final authority.
Introduction: Why Circuit Planning Is the Silent Guardian of Your Home
Visualize your home’s electrical system as a circulatory network: the utility connection is the aorta, the main panel functions as the heart, breakers act as calibrated valves, and branch circuits deliver energy like arteries. Just as vascular weaknesses threaten systemic health, undersized circuits, miscalculated loads, or outdated protection create compounding vulnerabilities. Safety organizations consistently identify electrical system failures among leading preventable residential fire causes—highlighting why proactive planning matters.
This isn’t about inducing anxiety; it’s about cultivating agency. Whether preparing for a renovation, evaluating an older property, or building foundational literacy, this knowledge bridges abstract concepts and tangible safety. Grounded in widely recognized electrical engineering principles and NEC frameworks—the benchmark for safe residential electrical design in the United States—this guide synthesizes fragmented insights into a unified methodology. We emphasize patterns observed across diverse residential contexts: where systems operate silently for decades, and where subtle oversights cascade into recurring issues. Remember: This resource educates. It does not replace licensed professional judgment. When in doubt, engage a qualified electrician. Safety is non-negotiable.
The Five-Pillar Framework for Intelligent Circuit Planning
Effective circuit planning transcends adding breakers until the panel fills. It requires balancing present needs with future adaptability, technical precision with practical usability, and regulatory alignment with proactive safety. After reviewing common pain points across residential electrical systems—from nuisance tripping in high-demand kitchens to insufficient capacity for evolving lifestyles—we developed the Five-Pillar Framework. Each pillar builds logically upon the last, creating interdependent layers of resilience. Think of it as architectural blueprints for your home’s electrical nervous system.
The Fundamental Principle: A masterfully planned circuit system operates invisibly in its success—delivering seamless, reliable power for decades while silently protecting occupants, property, and peace of mind through embedded safety logic.
Pillar 1: Decoding Electrical Loads—The Unseen Foundation of Every Decision
Before selecting a single breaker or drafting a circuit map, you must understand the electrical demands placed upon your system. An electrical load represents the total power consumed by devices connected to a circuit or service. Misjudging loads is the root cause of most circuit failures. This pillar breaks down load types, calculation methodologies, real-world application, and critical nuances.
What Exactly Constitutes an Electrical Load? Beyond Watts and Amps
Electrical load is quantified in watts (W) or kilowatts (kW), but circuit planning requires conversion to amperes (amps)—the unit protective devices and conductors are rated by. The foundational relationship:
Watts (W) = Volts (V) × Amps (A)
In North American residential systems, standard voltage is 120V for branch circuits and 240V for major appliances. Thus:
Amps (A) = Watts (W) ÷ Volts (V)
Loads fall into distinct behavioral categories requiring specific handling:
- Continuous Loads: Devices operating at full capacity for three hours or more (e.g., refrigerators in warm climates, aquarium pumps, security transformers, space heaters on timers). Critical rule: Circuits supplying continuous loads must be rated for at least 125% of the calculated load. Why? Sustained current generates heat; the 25% buffer prevents cumulative thermal stress on insulation.
→ IF a device runs continuously (≥3 hours), THEN multiply its wattage by 1.25 before circuit sizing. - Non-Continuous Loads: Short-duration devices (toasters, hair dryers, power tools). Calculated at 100% of nameplate rating.
- Motor Loads: Appliances with motors (AC units, furnaces, disposals) draw high inrush current (5–8× running amps) during startup. Breakers must tolerate this brief surge without nuisance tripping while protecting against sustained overloads. NEC Article 430 provides specific protocols.
- Reactive Considerations: Most modern devices (LEDs, computers) incorporate power factor correction. Legacy motors or transformers may introduce reactive power, effectively increasing current demand. While detailed calculations are industrial-scale, awareness matters when integrating older equipment.
Step-by-Step: Calculating Loads for a Single Branch Circuit
Scenario: Designing circuits for a home office with desktop computer (350W), dual monitors (50W each), laser printer (600W peak), LED lamp (60W), chargers (30W), and a portable space heater (1,500W).
- Inventory devices using verified nameplate ratings (never estimates):
Total connected load = 2,640W - Classify operation type:
- Space heater: Continuous (if used >3 hours consecutively)
- All others: Non-continuous
- Apply NEC calculation logic:
- Continuous portion: 1,500W × 1.25 = 1,875W
- Non-continuous portion: 1,140W
- Adjusted total = 3,015W
- Convert to amps (120V): 3,015W ÷ 120V ≈ 25.1A
- Evaluate against circuit limits:
- Max continuous load on a 20A circuit = 16A (80% rule per NEC 210.20)
- 25.1A exceeds capacity → Single circuit is inadequate
- Engineering the solution:
- Space heater: Requires dedicated 20A circuit (1,500W continuous → 1,875W adjusted → ~15.6A)
- Office equipment: Recalculated load (1,140W ≈ 9.5A) fits a 15A circuit, but a 20A circuit provides headroom for future additions
- Adaptive option: If budget-constrained during renovation, prioritize the heater’s dedicated circuit now; add the office circuit later using pre-run conduit (see Pillar 5)
→ IF total adjusted load exceeds 80% of circuit capacity, THEN split loads across dedicated circuits.
→ IF usage patterns are ambiguous (e.g., “Will I use the heater continuously?”), THEN conservatively apply the 125% factor.
Whole-House Load Calculation: Core Principles
For evaluating main service capacity (e.g., 100A vs. 200A) or planning major additions, the NEC Standard Calculation Method (Article 220) provides a structured approach. Key steps for a representative home:
- General lighting/receptacles: 3 VA per sq. ft. of habitable area
- Small-appliance circuits: Minimum two 1,500 VA kitchen circuits + one 1,500 VA laundry circuit
- Apply demand factors (NEC Table 220.42): First 3,000 VA at 100%; remainder at 35%
→ Why this matters: Acknowledges not all circuits operate at peak simultaneously - Fixed appliances: Sum nameplate ratings; apply 75% demand factor if ≥4 appliances
- Heating vs. cooling: Use the larger load (NEC 220.60)
- Total adjusted load ÷ 240V = required service amps
Critical nuance: This is illustrative. Actual calculations require meticulous documentation. When planning significant changes (EV charger, workshop), a professional load calculation is a minimal-cost investment preventing costly service upgrades later. Many building departments provide worksheets—request one early.
Common Load Calculation Friction Points & Adaptive Solutions
| Friction Point | Why It Matters | Adaptive Solution Path |
|---|---|---|
| Estimates vs. nameplates | “60W equivalent” LED draws ~9W; laptop chargers vary widely | → Always use manufacturer labels. For unlabeled older devices, use a plug-in power meter under typical operation |
| Phantom loads | Smart TVs, game consoles draw 1–5W continuously | → General lighting load allowance typically absorbs this. For critical circuits (server rooms), measure cumulative standby draw |
| Continuous load ambiguity | Refrigerator in hot garage? Holiday lights on 8-hr timer? | → IF ambient conditions or usage suggest extended runtime, THEN apply 125% factor conservatively |
| Voltage drop on long runs | Circuits >75 ft may cause dimming, motor overheating | → IF run exceeds 75 ft, THEN upsize conductor (e.g., 12 AWG instead of 14 AWG for 15A circuit). Use voltage drop calculators during planning |
| Future-proofing gaps | Unplanned EV charger, workshop expansion | → IF budget allows during renovation, THEN add 5,000 VA provisional load to service calculation. Run empty conduit to potential future locations (Pillar 5) |
Pillar 2: Breaker Selection and Sizing—The Precision Guardians of Your System
Circuit breakers protect conductors from damage due to overcurrent (overloads or short circuits). Selecting the correct breaker involves matching trip characteristics to wire gauge, load profile, and required safety functions.
Breaker Types: Purpose and Application Logic
- Standard Thermal-Magnetic:
- Thermal element: Bimetallic strip bends during sustained overloads (time-delay allows motor startups)
- Magnetic element: Solenoid trips instantly during high-current faults
- Use case: General circuits where AFCI/GFCI not required (increasingly rare)
- GFCI (Ground Fault Circuit Interrupter):
- Detects current leakage (>4–6mA imbalance between hot/neutral) indicating shock risk
- Required in: Bathrooms, garages, outdoors, kitchens (countertops + within 6 ft of sinks), laundry areas, crawl spaces (NEC 210.8)
- Critical insight: Primarily prevents shock; required even on circuits with low shock risk if location mandates it
- AFCI (Arc Fault Circuit Interrupter):
- Detects dangerous arcing signatures (frayed cords, loose connections) that can ignite materials
- Required on: All 15A/20A, 120V branch circuits supplying outlets (including lighting) in dwelling units (NEC 210.12)
- Critical insight: Primarily prevents fire; required even in low-fire-risk areas per code evolution
- Dual-Function (AFCI/GFCI):
- Integrates both protections. Ideal for kitchens, garages, laundry rooms where both hazards exist
- Adaptive tip: If panel space is limited and budget allows, dual-function breakers maximize protection per slot
→ IF a circuit serves locations requiring both AFCI and GFCI protection, THEN a dual-function breaker is often the most reliable solution.
→ IF nuisance tripping occurs with older appliances (e.g., laser printers), THEN consult an electrician—do not disable protection. Solutions may include dedicated circuits or equipment evaluation.
The Non-Negotiable Covenant: Breaker Amperage vs. Wire Gauge
The breaker protects the wire, not the appliance. Mismatching creates fire risk. NEC Table 310.16 defines conductor ampacities. Core residential reference (copper NM-B cable):
| Conductor Size | Max Breaker | Typical Applications | Critical Constraint |
|---|---|---|---|
| 14 AWG | 15A | Lighting circuits (where permitted) | Never use with 20A breaker. Prohibited in many new constructions |
| 12 AWG | 20A | General receptacles, kitchens, bathrooms | Minimum recommended for new branch circuits |
| 10 AWG | 30A | Dryers, water heaters, small AC | Verify appliance nameplate requirements |
| 8 AWG | 40A | Ranges, large AC, subpanel feeders | Confirm voltage drop for runs >50 ft |
| 6 AWG | 55A (typically 60A) | EV chargers, hot tubs, subpanels | Essential for future-proofing garage circuits |
Absolute Safety Imperatives:
– ❌ NEVER install a 20A breaker on 14 AWG wire. The wire overheats before the breaker trips.
– ❌ NEVER replace a tripping breaker with a higher-amperage one. This disables critical protection.
– ✅ Using a smaller breaker than wire allows (e.g., 15A on 12 AWG) is electrically safe but may cause nuisance tripping. Sometimes used intentionally for long runs to mitigate voltage drop.
– ⚠️ Aluminum wiring (common 1965–1973) requires CO/ALR-rated devices, antioxidant compound, and professional evaluation. Do not treat like copper.
Room-by-Room Breaker Strategy with Adaptive Pathways
| Location | Minimum Code Requirement | Proactive Enhancement | Budget-Constrained Path |
|---|---|---|---|
| Kitchen Countertops | Two 20A circuits (GFCI + AFCI) | Add third circuit for islands/peninsulas; dual-function breakers | Prioritize dual-function protection on existing circuits; label outlets by circuit to manage load |
| Refrigerator | Dedicated circuit (verify local GFCI rules) | Dedicated 15A/20A AFCI circuit; avoid sharing with countertops | If sharing is unavoidable per existing layout, monitor for nuisance tripping; document with electrician |
| Bathrooms | One 20A circuit for all receptacles (GFCI + AFCI) | Two circuits for 3+ bathrooms; dedicated circuit for heater-equipped fan | Ensure GFCI/AFCI protection is active; test monthly |
| Garage/Workshop | One 20A circuit (GFCI + AFCI for attached) | Subpanel with multiple dedicated circuits (lighting, tools, EV prep) | Install one additional dedicated 20A circuit for primary workbench; use WR GFCI outlets |
| EV Charger Prep | N/A (future need) | Run 6 AWG wire + 50A breaker to garage during renovation | Install empty conduit from panel to garage; label clearly for future electrician |
Breaker Coordination in Multi-Panel Systems
In homes with subpanels (e.g., detached garage), strategic sizing prevents unnecessary widespread outages:
– Goal: Selective coordination—the breaker closest to the fault trips first
– Basic rule: Feeder breaker (main panel) amperage ≥ 1.5× largest branch breaker in subpanel
→ Example: 60A feeder breaker supplies subpanel with 15A/20A branch breakers. A table saw fault trips the 20A breaker, not the 60A feeder
– Critical constraint: Feeder breaker must protect feeder conductors (e.g., 60A breaker requires min. 6 AWG copper)
– If coordination fails: Repeated feeder tripping indicates faulty branch breaker or extreme fault—consult an electrician. Never increase feeder size to “fix” tripping.
Pillar 3: Circuit Design and Layout—Mapping Power to Purpose
Physical circuit layout determines usability, serviceability, and long-term adaptability. This pillar covers circuit typologies, strategic placement, and embedding flexibility.
Circuit Typologies: Purpose and Modern Guidance
- Dedicated Circuits: Serve single equipment/location (refrigerator, sump pump, workshop tool).
→ Why: Prevents overloading, isolates faults, ensures critical equipment stays powered. Label clearly in panel: “Refrigerator – Kitchen,” not “Appliance 1.” - General Circuits: Serve multiple outlets/lighting across zones.
→ Best practice: Separate lighting and receptacle circuits. If a vacuum overloads a receptacle circuit, lights remain on for safe egress. Limit scope: one circuit per 2 average bedrooms. - Multi-Wire Branch Circuits (MWBCs): Single cable with two hots (opposite phases), shared neutral.
→ Modern constraint: Requires double-pole/handle-tied breakers (NEC 210.4). AFCI/GFCI compatibility is problematic; voltage imbalance risk if neutral fails.
→ Recommendation: Avoid in new installations. Dedicated circuits with individual neutrals are safer and align better with current code. If found in existing homes, verify proper handle-tying and consult an electrician about evaluation.
Strategic Outlet Placement Principles
- Height standards:
- Standard receptacles: 12–18″ above floor
- Kitchen countertops: 15–20″ above surface (within reach, below cabinets)
- Workbenches: 18–24″ above surface
- Switches: ~48″ to center (ADA-aligned)
- Spacing logic (NEC 210.52):
- Countertops: Receptacles ≤4 ft apart; at least one per island end
- Living areas: Receptacles ≤12 ft apart along walls
- Garages: At least one per vehicle bay
- Adaptive placement:
→ IF furniture layout is uncertain (open-concept space), THEN install floor outlets (rated for floor use) or extra wall outlets.
→ IF renovating a bathroom, THEN place GFCI receptacles on both sides of vanity (not directly above sink). Include a dedicated switched outlet inside the cabinet for toothbrushes/shavers.
→ IF building a workshop, THEN install WR GFCI receptacles every 6 ft along benches at convenient heights.
The “Empty Conduit” Strategy for Future Flexibility
During wall openings (new construction/renovation), run empty ENT (Electrical Nonmetallic Tubing) conduit between strategic points:
– Attic access → Entertainment center
– Basement utility area → Home office
– Main panel location → Garage (for future EV charger)
– Label both ends permanently: “TO: Garage Wall | FROM: Main Panel”
→ Why it works: Allows pulling new wires decades later without demolition. Minimal cost during construction; immense value during future upgrades. Adaptive path: Even running one conduit to the garage pays dividends for EV readiness.
Panel Capacity Planning Mindset
- Reserve 20–30% of panel slots for future expansion. A “full” panel blocks progress.
- IF panel space is limited, THEN consider:
- Replacing standard breakers with slim-type AFCI/GFCI only if panel labeling explicitly permits
- Installing a subpanel to offload circuits (e.g., move all garage circuits to a new subpanel)
- Proactively upgrading to a larger panel before needing it—less disruptive than emergency replacement
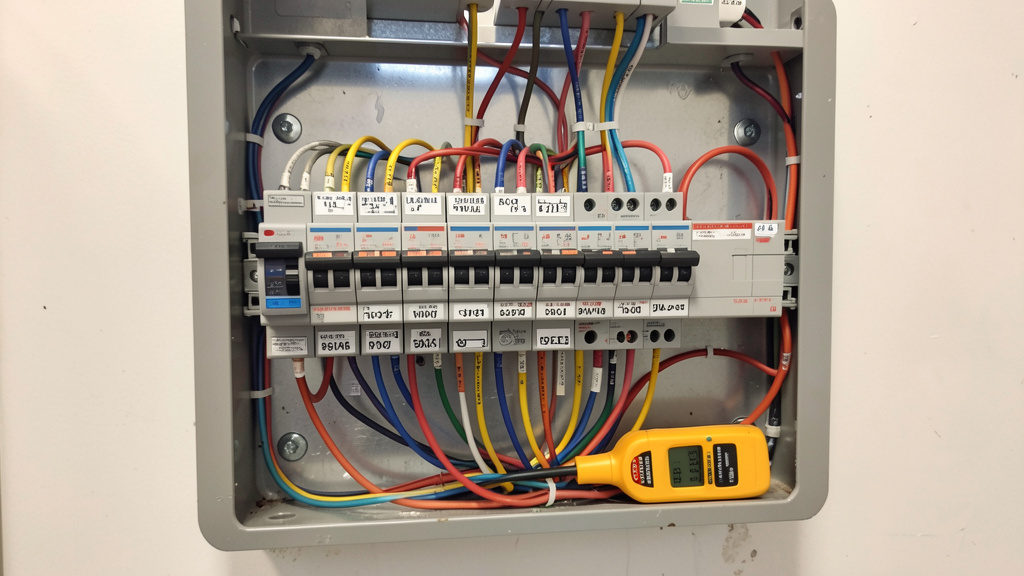
- Document meticulously: Photograph panel, create a digital circuit directory (location, purpose, wire size), update after modifications, share with household members.
Pillar 4: Safety Protocols and Code Compliance—Weaving Protection into Every Layer
Safety is the foundational thread in every decision—not an add-on. This pillar clarifies the “why” behind requirements and cultivates an inspection mindset.
GFCI vs. AFCI: Understanding the Hazard Each Addresses
| Protection Type | Primary Hazard Addressed | How It Works | Critical Testing Protocol |
|---|---|---|---|
| GFCI | Shock (current leakage through water/person) | Compares hot/neutral current; trips if imbalance >4–6mA | Press TEST monthly. Should cut power instantly. Reset after testing. Test after power outages. |
| AFCI | Fire (dangerous arcing from damaged wires/cords) | Analyzes current waveform 20,000+ times/sec for arc signatures | Press TEST monthly with a light on the circuit. Consult breaker instructions—some require load to test properly. |
Location Logic (NEC 2023):
– GFCI required where water contact is plausible (bathrooms, kitchens, garages, outdoors, laundry sinks)
– AFCI required on all 15A/20A, 120V branch circuits supplying outlets in dwelling units (bedrooms, living areas, kitchens beyond countertops, hallways, closets)
→ Key insight: “Outlet” includes receptacles, lighting fixtures, switches (NEC Article 100). AFCI protection is circuit-level.
→ IF a GFCI trips with nothing plugged in, THEN fault is likely in wiring or device—replace immediately.
→ IF an AFCI trips repeatedly with specific older equipment, THEN consult an electrician; do not disable protection.
Foundational NEC Articles for Informed Dialogue
Familiarity with these core articles empowers productive conversations with professionals:
– Article 100: Definitions (critical: Outlet, Branch Circuit, Continuous Load)
– Article 210: Branch Circuits (required circuits per room, GFCI/AFCI locations, receptacle spacing)
– Article 220: Load Calculations (methodology for service sizing)
– Article 240: Overcurrent Protection (breaker-to-wire matching)
– Article 250: Grounding and Bonding (safety net for fault currents)
– Article 300: Wiring Methods (cable securing, box fill, physical protection)
– Article 406: Receptacles (tamper resistance, weather resistance requirements)
⚠️ Critical Reminder: NEC editions update every three years (2020, 2023…). Your local jurisdiction adopts a specific edition, often with amendments. Always verify requirements with your building department before finalizing plans. What was compliant five years ago may not meet current standards.
Self-Verification Checklist Before Energizing or Renovating
Adopt this systematic review to catch issues early:
1. Box Fill (NEC 314.16): Overcrowded boxes cause heat buildup. Calculate required volume:
– Each conductor = 1 unit (size-based: 12 AWG = 2.25 cu in)
– All grounds = 1 unit
– Device yoke (switch/receptacle) = 2 units
– IF calculation exceeds box volume, THEN use a deeper box or reduce conductors
2. Connection Integrity:
– Wire nuts tight; no exposed copper beyond connector
– Prefer screw-terminal connections over push-in back-wires (more reliable long-term)
– Ground wires continuous and connected to all metal boxes/devices
3. Cable Protection (NEC 300.4, 334.30):
– NM cable stapled within 12″ of boxes, ≤4.5 ft intervals
– Steel plates where cable passes within 1.25″ of stud edge
– Conduit or MC cable below 8 ft in garages/workshops for physical protection
4. Panel Organization:
– Clear, accurate circuit labels (e.g., “Master Bath Receptacles”)
– Neutrals and grounds on separate bars in subpanels (bonded only in main panel)
– No double-tapping breakers unless explicitly listed for it
5. Protection Verification:
– Test every GFCI/AFCI device after installation
– Verify downstream protection: Plug lamp into outlet downstream of GFCI; pressing TEST should turn off lamp
🛑 Stop and Call a Professional If:
– You encounter aluminum wiring (silver-colored, often marked “AL”)
– Your panel is Federal Pacific (FPE) Stab-Lok®, Zinsco, or Challenger (documented failure risks)
– You observe burning smells, scorch marks, warmth at outlets/panel, or rust/corrosion
– You lack confidence in any step. Electricity rewards humility. A licensed electrician’s expertise is invaluable.
Pillar 5: Future-Proofing and Expansion—Building Adaptive Capacity
Today’s electrical demands differ vastly from two decades ago. Planning for evolution prevents premature obsolescence.
Anticipating Evolving Needs with Tiered Strategies
| Emerging Need | Proactive Path (New Construction/Renovation) | Adaptive Path (Existing Home) |
|---|---|---|
| Electric Vehicle | Run 6 AWG wire + 50A breaker to garage; install junction box labeled “EV Charger – Future Use” | Install empty conduit from panel to garage; document path for future electrician |
| Smart Home Systems | Ensure neutral wires in all switch boxes; run low-voltage conduit (½” ENT) from central location to key rooms | During switch replacements, verify neutrals are present; add conduit where walls are open |
| Workshop Expansion | Install 100A subpanel in garage with 8–12 slots; include one 240V circuit (NEMA 6-20) | Add one dedicated 20A circuit now; plan conduit path for future subpanel feeder |
| Renewable Energy | Confirm panel has space for backfeed breaker; verify busbar rating supports added generation (NEC 705.12) | Consult solar installer early; some older panels require upgrade before interconnection |
| Home Office/AV | Dedicated circuits for servers/AV equipment; consider isolated ground receptacles for high-end audio | Use high-quality surge protectors; avoid daisy-chaining power strips |
→ IF budget allows during any wall-opening project, THEN prioritize running empty conduit—it enables future upgrades at minimal marginal cost.
→ IF panel capacity is uncertain before adding major loads (EV, workshop), THEN request a professional load calculation.
Recognizing Panel Capacity Limits
Signs Your System Needs Attention:
– Frequent breaker tripping during normal appliance use
– Lights dimming when AC/refrigerator starts
– Burning smells, discoloration at outlets/panel, or warmth on faceplates
– Two-prong (ungrounded) outlets throughout home
– Reliance on extension cords as permanent solutions
– Known obsolete panels (FPE, Zinsco, Challenger)
Upgrade Pathways:
1. Optimize existing panel: Replace standard breakers with slim-type AFCI/GFCI if permitted; consolidate lightly loaded circuits where code allows.
2. Install subpanel: Offload circuits from congested areas (e.g., move garage/workshop circuits to new subpanel). Frees slots in main panel.
3. Service upgrade: Necessary when total load exceeds service capacity (e.g., 100A service in modern home with AC, EV). Typically upgraded to 200A. Proactive timing: Schedule during major renovations when walls are open.
The Decadal Electrical Review: A Proactive Habit
Set a calendar reminder every 10 years:
– Test all GFCI/AFCI devices (press TEST/RESET)
– Inspect visible components: outlets, switches, faceplates for damage, discoloration, looseness
– Update panel circuit directory if modifications occurred
– Check appliance cords for fraying; ensure furniture isn’t pinching wires
– For homes >25 years old, or after major weather events, hire a licensed electrician for comprehensive inspection (main lugs, grounding system, service entrance condition)
This transforms electrical safety from reactive concern into managed home stewardship.
Navigating Real-World Scenarios: Applying the Framework
Scenario: The Comprehensive Kitchen Remodel
Challenge: Updating a 1990s kitchen with new induction cooktop (7,200W), wall oven (5,000W), built-in microwave (1,500W), dishwasher (1,200W), disposal (900W), under-cabinet lighting (200W), and ten countertop receptacles. Homeowner plans future wine cooler.
Framework Application:
– Pillar 1 (Loads):
– Cooktop + oven combined load = 12,200W → ~50.8A at 240V. IF manufacturer permits combination circuit, THEN dedicated 50A circuit (6 AWG). VERIFY appliance manuals first.
– Microwave: Dedicated 20A circuit prevents tripping during countertop appliance use.
– Countertops: Minimum two 20A Small-Appliance Branch Circuits (SABCs) required. Given high appliance density (air fryer, Instant Pot, blender), add a third SABC. Split logically: Circuit A (left island/perimeter), B (right island/perimeter), C (peninsula).
– Future wine cooler: Provision dedicated 15A circuit path during remodel.
– Pillar 2 (Breakers):
– SABCs: 20A dual-function (AFCI/GFCI) breakers (required for kitchen receptacles per NEC 210.8/210.12)
– Microwave/Dishwasher/Disposal: Dedicated AFCI circuits; verify local GFCI requirements for dishwasher
– Panel check: Total new breakers = 7–8. Confirm main panel has capacity; if not, plan subpanel installation concurrently.
– Pillar 3 (Layout):
– Run new cables in ½” ENT conduit where feasible (within walls during remodel) for future wire replacement
– Install pop-up receptacles in islands for clean aesthetics
– Place GFCI-protected receptacles strategically: Use breaker-level protection to avoid disabling all countertop power if one trips
– Run low-voltage conduit from attic to island for future smart faucet/data
– Pillar 4 (Safety):
– All countertop receptacles within 6 ft of sink require GFCI protection (dual-function breakers satisfy)
– Verify box fill in tight spaces behind appliances; use deep 4″ square boxes with raised covers
– Label every circuit clearly in panel: “Kitchen Counter Left,” “Microwave,” “Island Receptacles”
– Pillar 5 (Future-Proofing):
– Run empty conduit from panel to intended wine cooler location
– Document all circuit paths and wire sizes in renovation records
→ Key takeaway: Minimum code is a starting point. Proactive enhancements (third SABC, conduit runs) prevent frustration and costly retrofits later. Always verify appliance-specific requirements with manufacturer instructions.
Your Questions, Answered
Q: Do I really need AFCI protection on lighting circuits? It seems unnecessary for low-wattage LEDs.
A: Yes, per NEC 210.12, AFCI protection is required for all 15A/20A, 120V branch circuits supplying outlets in dwelling units—including lighting outlets. Arcing faults can originate from damaged wires inside walls, faulty switches, or degraded fixtures, not just the bulbs themselves. AFCI technology has evolved to minimize nuisance tripping with modern LED loads.
Q: Can I use a 15A breaker on a circuit wired with 12 AWG wire?
A: Yes, this is electrically safe. The breaker protects the wire; 12 AWG is rated for up to 20A, so a 15A breaker provides adequate protection. This is sometimes done intentionally for long circuit runs to mitigate voltage drop. However, ensure connected loads don’t consistently approach 15A to avoid nuisance tripping.
Q: My bathroom has a heater-equipped exhaust fan. Does it need its own circuit?
A: Likely yes. Per NEC 424.3(B), fixed space-heating equipment often requires a dedicated circuit. Check the fan’s nameplate: if the heater element exceeds 700W (typical), it generally needs its own circuit. Never share with general lighting or receptacles. Verify with manufacturer instructions and local code.
Q: I found a multi-wire branch circuit (MWBC) in my older home. Is it safe?
A: MWBCs can be safe if installed correctly: handle-tied or double-pole breaker ensuring simultaneous disconnection of both hots (NEC 210.4(B)), and proper neutral sizing. However, they pose challenges with modern AFCI/GFCI requirements and voltage imbalance risks if the neutral fails. Consult a licensed electrician to evaluate its condition, verify breaker configuration, and discuss whether dedicated circuits would enhance safety and flexibility.
Q: How do I know if my panel has enough capacity for an EV charger?
A: A professional load calculation is essential. Level 2 EV chargers typically require a 40A–60A dedicated circuit. An electrician will: 1) Calculate your home’s existing connected load per NEC Article 220, 2) Compare against your service rating (e.g., 100A, 200A), 3) Determine available capacity. Never guess—adding significant load to an overloaded system creates fire risk.
Q: Are tamper-resistant (TR) receptacles really necessary in areas without children?
A: Yes. NEC 406.12 requires TR receptacles in all dwelling unit areas (since 2008/2011 editions). They prevent foreign objects from being inserted into slots, reducing shock risk for visitors, future occupants, or during unexpected situations. They function identically to standard receptacles when plugs are inserted—no usability trade-off.
Q: Why does my GFCI outlet trip when I plug in my refrigerator?
A: Refrigerators can cause nuisance GFCI tripping due to compressor startup surges or minor leakage in older motors. However, 2023 NEC generally requires GFCI protection for all kitchen receptacles. Do not remove GFCI protection. Solutions: 1) Place refrigerator on a dedicated circuit with a GFCI breaker (more stable than outlet), 2) Consult an electrician to verify appliance condition, 3) Check with your AHJ—some jurisdictions allow documented exceptions for dedicated refrigerator circuits.
Q: What’s the difference between a main panel and a subpanel?
A: The main panel connects directly to the utility service entrance and contains the main disconnect. A subpanel is fed from the main panel via a feeder breaker and serves a specific area (garage, addition). Critical distinction: In the main panel, neutral and ground wires connect to the same bus bar (bonded). In a subpanel, neutrals and grounds must be on separate, isolated bus bars (NEC 250.32). Mixing these creates shock hazards.
Q: Can I install a tandem (double-stuff) breaker to add a circuit in a full panel?
A: Only if your panel’s labeling explicitly permits tandem breakers in that specific slot. Many modern panels prohibit them, especially where AFCI/GFCI protection is required (tandem AFCI/GFCI breakers are rare and panel-specific). Installing an unauthorized tandem breaker risks overheating, fire, or voiding panel warranty. Safer paths: optimize existing circuits, install a subpanel, or upgrade the main panel. Consult an electrician.
Q: How often should I test GFCI and AFCI devices?
A: Monthly. Press the TEST button—it should click and cut power instantly. Press RESET to restore. Test after any power outage. For AFCI breakers, some manufacturers recommend testing with a light on the circuit; consult instructions. Replace any device that fails to trip or reset. Regular testing ensures life-saving protection remains functional.
Conclusion and Next Step
Circuit planning is quiet stewardship—a deliberate investment in safety, functionality, and adaptability that operates invisibly when done well. We’ve explored how foundational load understanding prevents hazards, how precise breaker-wire matching forms an unbreakable safety covenant, how intentional layout enhances daily life, how embedded protections (AFCI/GFCI) address distinct risks, and how forward-looking strategies future-proof your home.
Recap: Three Anchoring Principles
1. Calculate before you install: Load assessment isn’t optional—it’s the bedrock of safety and performance.
2. Match protection to purpose: Breakers protect wires; devices protect people. Understand the “why” behind each requirement.
3. Design for tomorrow: Conduit runs, panel headroom, and clear documentation transform future upgrades from crises into conveniences.
The 24-Hour Rule
Within the next day, locate your home’s electrical panel. Verify every circuit is clearly labeled with its location and purpose (e.g., “Upstairs Hall Lights,” “Garage Receptacles”). If labels are missing, faded, or vague:
1. Turn off one breaker at a time
2. Note which lights/outlets lose power
3. Update the panel directory with a waterproof label or digital photo
This simple act builds immediate awareness and empowers safer interactions with your system.
The Big Picture
Your home’s electrical system is a dynamic ecosystem—not a static installation. Seasonal changes (summer AC loads, winter heating demands), evolving lifestyles (remote work, EV adoption), and technological shifts continuously reshape its demands. By approaching circuit planning with humility, curiosity, and respect for professional expertise, you cultivate a foundation that safely powers not just today’s needs, but tomorrow’s possibilities. When uncertainty arises, pause and consult a licensed electrician. That moment of caution is where true safety begins.
Explore Our Complete System:
Understanding Your Home’s Main Electrical Panel | GFCI vs. AFCI: A Practical Safety Guide | Conduit Strategies for Future-Proof Renovations | Decoding Electrical Panel Labels: A Homeowner’s Map | The 10-Year Home Systems Maintenance Checklist | Workshop Wiring: Safety and Efficiency for DIY Spaces | Preparing for Solar: Electrical Readiness Assessment