Your systematic, material-specific roadmap to diagnosing and fixing every common floor problem—without replacing the entire floor.
That persistent squeak under the third floorboard near the bedroom door. The deep scratch from moving furniture. The mysterious gap that appeared between planks after a humid summer. Floor damage is inevitable in any lived-in home, but replacement is rarely the only—or most economical—solution. This definitive guide transforms you from frustrated homeowner to confident floor diagnostician and restorer. We break down every common issue across wood, laminate, vinyl, tile, and stone floors, providing step-by-step repair protocols, tool-specific guidance, environmental considerations, and prevention strategies synthesized from industry installation standards and restoration best practices. Whether you have ten minutes for a quick fix or a weekend for a deeper repair, you’ll find a precise, actionable path to quiet, smooth, and beautiful floors that honor your home’s history and integrity.
Introduction: Why Floors Fail—and Why Most Repairs Fail Too
Floors are dynamic systems, not static surfaces. They expand and contract with seasonal humidity shifts, bear concentrated loads from furniture legs, endure abrasive traffic from footwear and pets, and react to subtle structural shifts in the building itself. A hardwood floor installed in a century-old home responds differently to environmental changes than luxury vinyl plank laid last year over concrete. Understanding this interplay between material properties, environmental physics, and daily use is the foundational step toward effective repair. A squeak isn’t merely an auditory annoyance; it’s a precise symptom of friction between components under stress. A scratch isn’t just cosmetic; its depth, width, and location determine whether surface treatment, localized filling, or board replacement is required. Jumping straight to a quick fix without thorough diagnosis often wastes time, materials, and effort—and can even accelerate further deterioration or create new problems.
This handbook is built upon a non-negotiable principle: accurate diagnosis precedes effective repair. Methodologies referenced align with National Wood Flooring Association (NWFA) installation guidelines, International Residential Code (IRC) standards for subfloor integrity, and material-specific manufacturer recommendations to ensure techniques prioritize structural safety, longevity, and aesthetic harmony. Whether your floor is solid oak installed in 1920, engineered bamboo in a modern condo, sheet vinyl in a mid-century kitchen, or ceramic tile in a 1980s bathroom, the systematic diagnostic framework and repair protocols within apply universally. You’ll gain the knowledge to assess variables, select appropriate materials, execute repairs with confidence, and implement preventative habits that extend your floor’s functional life—all while avoiding unnecessary full-floor replacements.
The 5-Point Floor Assessment: Your Diagnostic Framework
Before selecting a single tool or purchasing repair materials, invest ten focused minutes in structured diagnosis. Misdiagnosis is the single greatest cause of failed DIY floor repairs. Professional assessment protocols follow a consistent pattern to isolate variables before recommending intervention. Adopt this five-step framework for any floor issue you encounter. Keep a small notebook or use your phone’s notes app to document findings—this creates a repair roadmap and valuable historical record.
Step 1: Identify the Floor Type and Construction Method
This is non-negotiable. Repair techniques are entirely material-dependent. Begin by determining:
– Material Composition: Solid hardwood (typically ¾” thick, tongue-and-groove), engineered wood (plywood core with real wood veneer), laminate (photographic layer under melamine wear layer), luxury vinyl plank/tile (LVP/LVT—rigid core with vinyl wear layer), sheet vinyl, ceramic/porcelain tile, natural stone (marble, slate, travertine), or concrete.
– Installation Method: Nailed down (common for solid wood over wood subfloor), glued down (common for engineered wood, vinyl, tile over concrete), floated (laminate, engineered, LVP with underlayment, not attached to subfloor), or mortar-set (tile/stone).
– How to Verify: Check unfinished areas first—remove a floor vent cover, inspect closet corners, or look from below in a basement/crawlspace. For finished areas: Tap firmly—a hollow sound suggests floated installation; solid thud suggests nailed/glued. Examine edges near baseboards: Gaps may reveal plank edges. When in doubt, consult original installation records, home inspection reports, or contact the builder. Critical nuance: Many homes have multiple floor types (e.g., hardwood in living areas, tile in bathrooms). Assess each problem area individually.
Step 2: Locate and Characterize the Damage Precisely
Vague descriptions like “scratch in the hallway” lead to failed repairs. Become a forensic observer:
– For Squeaks/Creaks: Note exact location (measure from wall corners), when it occurs (only when stepped near seam? only in morning?), sound quality (high-pitched squeak vs. low groan), and triggering action (heel strike vs. full weight).
– For Visual Damage: Use a ruler or caliper app. Measure scratch length, width, and—critically—depth using the fingernail test (detailed later). Photograph under consistent, bright lighting from multiple angles. Note pattern: Is damage clustered near entryways (indicating grit abrasion)? Along furniture edges (drag marks)? Randomly scattered (pet claws, dropped objects)?
– For Structural Issues: Use a straightedge (level or ruler) to check for cupping (edges raised), crowning (center raised), buckling (boards lifting), or gaps. Measure gap width at multiple points. Note if issues correlate with seasonal changes (e.g., gaps widen in winter).
Step 3: Determine the Root Cause Through Iterative “Why” Analysis
Symptom-focused repairs fail. Target the origin. Example chain:
– Symptom: Squeak near bedroom door.
– Why? Board rubbing on nail during flexing.
– Why loose? Humidity dropped from 50% to 30% after new furnace installed.
– Why now? Furnace lacks humidifier; dry air causes wood shrinkage.
– Root Cause: Inadequate humidity control, not faulty installation.
Another example:
– Symptom: Deep scratch near dining table.
– Why? Chair leg dragged during seating.
– Why dragged? Hard plastic casters on chair.
– Why not noticed? No protective pads installed during furniture setup.
– Root Cause: Lack of furniture protection protocol, not floor vulnerability.
Document this chain. True repair addresses the root cause (adding humidifier, replacing casters) and the symptom (securing the board, filling the scratch).
Step 4: Assess Environmental and Usage Context
Floors exist within ecosystems. Ignoring context guarantees recurrence.
– Humidity & Temperature: Use an inexpensive hygrometer ($10–$15). Ideal range for wood floors: 35–55% relative humidity, 60–80°F. Note fluctuations: Does HVAC run constantly? Is the room sun-drenched? Basement floors face higher moisture vapor emission.
– Water Exposure History: Recent spills? Leaky appliance? Roof leak? Even minor, repeated moisture exposure weakens adhesives and warps materials.
– Traffic Patterns: High-traffic zones (hallways, entryways) need durable repairs. Pet zones require scratch-resistant solutions. Furniture placement concentrates load—check for indentations under legs.
– Subfloor Access: Can you access the area from below (basement, crawlspace)? This dramatically expands repair options for squeaks.
Step 5: Evaluate Repair Feasibility, Safety, and Risk
Honest self-assessment prevents injury and damage.
– Skill Level: Are you comfortable drilling precisely? Using adhesives? Handling sharp tools? Start with low-risk repairs (scratch concealment) before attempting board replacement.
– Tool Access: Do you own or can you borrow required tools? Renting specialized tools (oscillating multi-tool) may be cost-effective for one-time repairs.
– Safety Hazards: Check for electrical wires or plumbing near repair area (use stud finder with AC detection). Wear safety glasses—debris flies during drilling/sanding. Ensure adequate ventilation when using adhesives or finishes.
– Warranty Considerations: Is the floor under manufacturer warranty? DIY repairs may void coverage. Contact manufacturer first for guidance.
– When to Pause: If you observe significant structural sagging, widespread soft spots, visible mold growth beneath flooring, or suspect major water intrusion, stop. Consult a structural engineer or certified flooring professional immediately.
The Fundamental Principle: Floor damage reflects the interaction of material properties, environmental conditions, and human activity. Effective repair requires listening to all three dimensions before acting.
This framework transforms overwhelming problems (“my whole floor is noisy”) into actionable intelligence (“a 36-inch section of red oak flooring, installed nail-down over ¾” plywood subfloor, produces a high-frequency squeak when stepped 12 inches from the east wall seam due to seasonal shrinkage in low humidity”). With this clarity, you select the precise repair—not a generic guess. Now, let’s apply this intelligence to specific damage types.
Squeaky Floors: From Annoying Creaks to Silent Stability
Squeaks occur when two components move against each other under pressure: floorboard rubbing on subfloor, subfloor shifting on joist, nail shaft grinding in wood, or underlayment shifting in floated systems. Temperature and humidity changes cause wood to expand and contract, loosening fasteners over time. In tile floors, loose mortar or cracked substrate creates movement. Understanding the physics of the friction point guides the most effective, least invasive repair.
Why Squeaks Happen: The Material Science Breakdown
Wood is hygroscopic—it absorbs and releases moisture from the air. At 30% humidity, a 5-inch-wide oak board may shrink by approximately 1/16 inch compared to its dimension at 50% humidity. This microscopic movement loosens nails over years. When you step, the board flexes downward, the nail shaft rubs against the wood hole wall, and vibration creates sound. In floated floors (laminate, LVP, engineered wood), the entire floor “floats” on underlayment. If the expansion gap at walls is insufficient or underlayment shifts, planks rub at seams. In concrete-subfloor installations, adhesive failure allows movement. Crucially, not all squeaks indicate structural danger—most are cosmetic annoyances from normal material behavior. However, sudden new squeaks combined with visible sagging warrant professional evaluation.
The Squeak Repair Strategy Matrix: Match Method to Access and Material
| Access Scenario | Solid/Hardwood (Nailed) | Engineered/Laminate/LVP (Floated) | Tile/Vinyl (Glued Down) |
|---|---|---|---|
| From Above (No Subfloor Access) | Counter-snap screws, lubrication, humidity control | Adhesive injection at seam, expansion gap verification | Epoxy injection (tile), re-adhere loose section (vinyl) |
| From Below (Basement/Crawlspace) | Shim gaps, screw subfloor to joist, glue blocks | Not applicable (floated floors lack subfloor attachment) | Secure substrate, inject adhesive through subfloor |
| No Physical Access / Temporary Fix | Talcum powder/graphite in seams, area rugs | Humidity stabilization, furniture pad adjustment | Professional evaluation recommended |
Method A: Repairing Squeaks from Above (Most Common Homeowner Scenario)
Tools & Materials: Stud finder with deep-scan mode, pencil, drill with depth stop, countersink bit, wood screws (length = floor thickness + subfloor thickness + ¾” into joist), wood plugs matching floor species (or color-matched filler), wax-based squeak eliminator powder (optional), finish nail set (for prefinished floors).
Step-by-Step Protocol for Nailed Wood Floors:
1. Locate the Joist Precisely: This is critical. Use a stud finder on the floor surface. Mark detected joist edges with low-tack painter’s tape. Critical nuance: Floor joists typically run perpendicular to floorboards. If boards run east-west, joists run north-south. Verify by tapping firmly with a hammer handle—solid “thud” over joist, hollow “drum” between joists. Have a helper stand on the squeaky spot while you tap to confirm location. Mark the exact squeak point and joist centerline.
2. Drill Pilot Hole with Depth Control: Set drill depth stop to prevent drilling through subfloor. Pilot hole should be slightly smaller than screw diameter. Drill at a slight angle (5–10 degrees) toward the squeak source if the squeak isn’t directly over the joist center. Why angle? Increases chance of screw biting into the moving component.
3. Drive Screw Securely: Use a screw long enough to penetrate the finished floor, subfloor, and bite at least ¾ inch into the joist. Drive until snug—do not overtighten, which can crack the board or raise a “volcano” of wood around the screw head. Stop when resistance increases significantly.
4. Countersink and Conceal: Use a countersink bit to recess the screw head 1/16 inch below surface. For unfinished/site-finished floors: Insert a wood plug cut from matching scrap (glue with wood glue), sand flush, stain, and finish to blend. For prefinished floors: Use a specialized counter-snap kit (screw with break-off head and snap-in color-matched cover) designed to avoid finish damage. Alternative: For discreet repairs on dark floors, use black oxide screws and fill hole with matching wood filler.
5. Test and Iterate: Have helper step on repaired area. If squeak persists, drive a second screw 2–3 inches away along the same joist line. Avoid placing screws closer than 2 inches to prevent splitting.
Common Mistake Alert: Using screws too short—they only secure floorboard to subfloor, not subfloor to joist, so movement continues at the joist interface. Pro Insight: For squeaks spanning multiple boards near a seam, drive screws through both boards into the joist below the seam for maximum stability.
For Floated Floors (Laminate, Engineered Wood, LVP):
Floated floors must have expansion space at walls (typically ¼ inch). Screwing down creates buckling risk. Instead:
– Adhesive Injection Technique: Drill a tiny pilot hole (1/16 inch) at the plank seam near the squeak. Inject a minuscule amount (less than a pea-sized drop) of PVA wood glue (for wood-core planks) or manufacturer-recommended adhesive using a syringe. Wipe excess immediately with damp cloth. Place a heavy book or weight directly over the injection point for 24 hours. Critical caution: Too much adhesive causes plank swelling. Test adhesive compatibility on scrap plank first. This method works best for minor seam movement.
– Expansion Gap Verification: Remove baseboard molding near the squeak. Measure the gap between plank edge and wall. If less than ¼ inch, the floor is compressed against the wall, causing friction. Carefully remove affected planks (starting at the wall), trim planks to restore proper gap, reinstall. Requires plank removal skill—practice on scrap first.
– Underlayment Adjustment: If squeak is widespread and new after installation, underlayment may be bunched. Requires partial floor disassembly—best left to professionals unless you have experience.
Method B: Repairing Squeaks from Below (Basement or Crawlspace Access)
This approach is widely regarded as highly effective for wood floors with accessible subfloors—completely invisible from above and addresses movement at the source.
1. Pinpoint the Squeak Location: Have a helper walk slowly over the squeaky area above while you observe from below with a bright headlamp. Listen and watch for movement between subfloor and joist. Mark the exact spot on the joist with chalk or tape. Pro tip: Sprinkle baby powder along the joist-subfloor seam; movement will disturb the powder, revealing the friction point.
2. Secure Subfloor to Joist: Drive a 1½-inch coarse-thread drywall screw (for wood subfloor) or 2-inch construction screw (for thicker subfloors) through the subfloor into the joist at the marked location. Use a washer if subfloor is OSB or particleboard to prevent pull-through. Drive until snug—do not overdrive and dimple the subfloor.
3. Shim Persistent Gaps: For visible gaps (1/16 inch or larger) between subfloor and joist: Cut a cedar or pine shim to length. Apply construction adhesive to the shim. Tap gently with a hammer until snug—do not force, which can lift the floor above. Wipe excess adhesive. Cedar shims resist compression over time better than pine.
4. Install Glue Blocks for Large Gaps or Joist Deflection: Cut a 2×4 block 1/8 inch longer than the gap between two adjacent joists directly under the squeak. Coat both ends liberally with construction adhesive. Wedge tightly between joists. Secure each end to the joists with two 2½-inch screws. This stabilizes the joist system itself. Safety first: Wear safety glasses—debris falls when hammering/screwing below.
Why this method excels: Eliminates movement at the source without touching the finished floor surface. Ideal for historic homes where preserving original flooring is critical. Critical note: In older homes with irregular framing, consult structural documentation before adding blocks.
Method C: Non-Invasive and Temporary Mitigation Strategies
- Lubrication Technique: Sprinkle talcum powder, powdered graphite, or commercial squeak-eliminator powder into board seams over the squeak area. Have helper step repeatedly to work powder into the friction point. Reduces friction temporarily (weeks to months). Ideal for rental properties, pre-sale quick fixes, or areas where drilling isn’t feasible. Limitation: Powder washes away with cleaning; not a permanent solution.
- Humidity Stabilization: If squeaks worsen consistently during dry winter months (verified with hygrometer readings below 35%), implement whole-house or room-specific humidification. Maintain 35–55% relative humidity. Wood swells slightly, closing micro-gaps causing friction. Monitor with a digital hygrometer placed near the problem area. This addresses the root environmental cause for seasonal squeaks.
- Strategic Area Rugs: Place a dense, thick-pile rug with a non-slip rubber or felt pad directly over the squeaky zone. The pad absorbs impact energy, and the rug mass dampens vibration. Choose rugs sized to cover the entire problem area plus 12 inches beyond. Practical benefit: Adds comfort and style while masking noise—ideal for nurseries, bedrooms, or home offices where quiet is paramount.
Critical Safety Insight: A squeak that appears suddenly after heavy furniture placement, accompanied by visible floor depression, unevenness, or a “springy” feel underfoot, may indicate compromised subfloor or joist damage. Cease use of the area immediately. Inspect from below if possible. If sagging exceeds 1/8 inch over a 10-foot span or you observe cracked joists, consult a structural engineer before proceeding. Safety always supersedes cosmetic repair.
Surface Scratches and Scuffs: Restoring Finish Without Refinishing
Scratches exist on a spectrum—from superficial finish abrasions to deep gouges penetrating into the substrate. The repair path depends entirely on depth, material, and finish type. The universal diagnostic tool requires no special equipment: the fingernail test.
The Fingernail Test: Diagnose Scratch Depth in 10 Seconds
Run your fingernail perpendicular across the scratch (not along its length):
– No Catch: Nail glides smoothly. Scratch is confined to the clear finish layer (polyurethane, aluminum oxide). Purely cosmetic; often cleanable or polishable.
– Slight Catch: Nail catches gently but doesn’t snag. Scratch has penetrated through the finish into the very top surface of the wood or wear layer. Requires filling and localized refinishing.
– Deep Catch: Nail snags firmly or catches completely. Scratch has removed material, creating a visible groove in the wood fiber, laminate core, or vinyl layer. Requires substantial filling, sanding, and refinishing—or plank replacement.
Why this works: Your fingernail provides immediate tactile feedback about depth far more reliably than visual inspection alone, especially under variable lighting. Perform this test before selecting any repair product.
Repair Protocols by Floor Material and Scratch Depth
Hardwood and Engineered Wood Floors
Light Scratches (No Catch):
– Cleaning Restoration Method: Mix 2 tablespoons baking soda with 1 cup warm water to form a paste. Dip a soft, lint-free microfiber cloth into the paste. Rub gently along the wood grain over the scratch for 15–20 seconds. Wipe clean with a damp cloth. Buff dry with a second dry microfiber cloth. Baking soda’s mild abrasiveness lifts embedded dirt and micro-scratches without damaging the finish. Test first: Always test in an inconspicuous area (inside closet) to ensure no finish dulling occurs. Works best on satin/matte finishes; use extra caution on high-gloss.
– Polishing Method: Apply a water-based hardwood floor polish specifically designed for your finish type (check manufacturer recommendations). Pour a dime-sized amount onto a clean microfiber applicator pad. Work in small sections (2 ft x 2 ft), following wood grain. Allow to dry 15–20 minutes per section. Buff lightly with a dry microfiber cloth. Restores sheen and optically minimizes micro-scratches. Critical note: Do not use oil-based polishes on water-based polyurethane finishes—they can create hazing. When in doubt, contact floor manufacturer.
Moderate Scratches (Slight Catch):
1. Clean and Dry Thoroughly: Remove all dust and debris from the scratch using a soft brush or compressed air. Wipe with isopropyl alcohol (70%) on a cotton swab to degrease. Allow to dry completely.
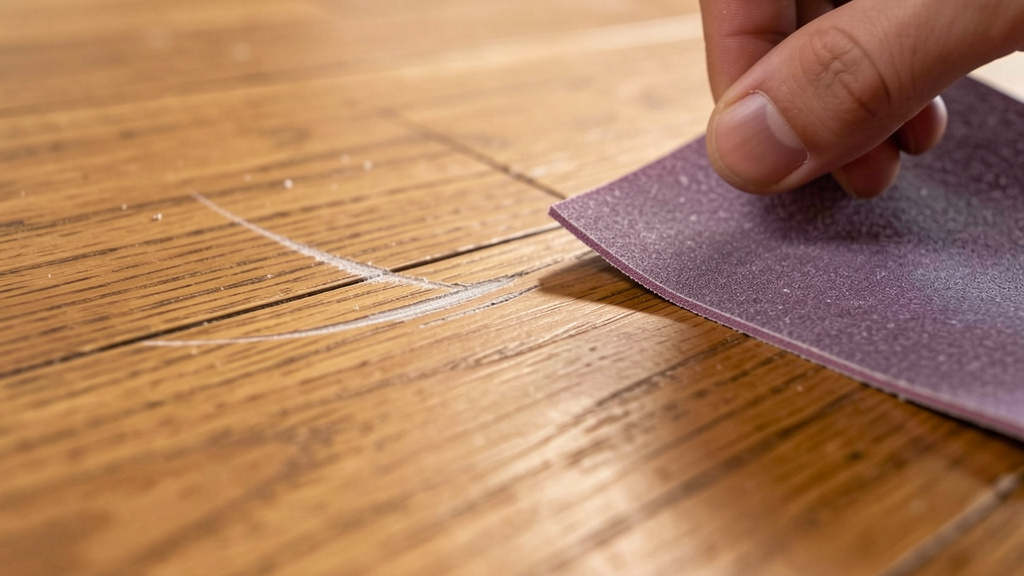
2. Apply Scratch Concealer: Select a wax stick or stain marker matching your floor color as closely as possible. Rub the concealer firmly back-and-forth across the scratch until filled. Wipe away excess immediately with a soft cloth. For deeper color penetration, gently heat the area with a hairdryer on low setting for 10 seconds—this melts the wax slightly, allowing it to flow deeper. Buff lightly. Pro tip: Keep multiple shades on hand (light, medium, dark). Layer lighter shade first, then darker to mimic wood grain variation. Brands like Howard, Rejuvenate, and Minwax offer extensive color ranges.
3. Natural Alternative: The Walnut Method: Break a raw walnut in half. Rub the meaty interior firmly over light-to-moderate scratches on light-colored woods (oak, maple, birch). Natural oils and tannins in the walnut darken the scratch to blend with surrounding wood. Wipe excess oil with cloth after 5 minutes. Works best on unfinished or oil-finished floors; test on prefinished floors first as oils may not penetrate sealed surfaces. Limitation: Not effective on dark-stained floors or non-wood materials.
Deep Scratches (Deep Catch):
1. Precision Sanding: Fold 120-grit sandpaper into a 1-inch square pad. Sand only within the scratch groove, following the wood grain direction. Use light pressure—just enough to smooth rough edges. Feather the sanded area outward ¼ inch beyond the scratch edges to create a gradual transition. Vacuum thoroughly with a soft brush attachment. Wipe with tack cloth.
2. Stain Application: Dip a cotton swab into wood stain matching your floor. Dab excess on paper towel. Apply stain only to the sanded area, following grain. Let sit 30 seconds. Wipe away excess with clean cloth. Allow to dry per manufacturer instructions (typically 1–2 hours). Repeat if color is too light. Critical nuance: Stain penetrates sanded wood differently than surrounding finished wood. Multiple thin coats blend better than one heavy coat. Test stain on scrap wood or hidden area first.
3. Finish Application: Apply 2–3 thin coats of finish matching your floor’s original type (water-based polyurethane for clarity and fast dry time; oil-based for traditional amber tone and durability). Use a small artist’s brush. Feather each coat ½ inch beyond the repair area. Lightly sand between coats with 220-grit sandpaper once dry to the touch. Final coat should be smooth and level with surrounding floor. Advanced technique: For prefinished floors with aluminum oxide finish (extremely hard), deep scratches often cannot be perfectly matched. Consider board replacement for highly visible areas—contact manufacturer for replacement plank sourcing.
Laminate and Luxury Vinyl Plank (LVP) Floors
Laminate has a thin photographic layer under a clear melamine wear layer; it cannot be sanded. LVP is homogeneous through its wear layer but has a printed design layer beneath. Repair focuses on concealment or replacement.
Laminate Floors:
– Light Scratches: Clean with manufacturer-approved laminate cleaner. Apply laminate-specific repair polish with microfiber cloth. Buff after drying. Polishes fill micro-abrasions optically.
– Moderate to Deep Scratches: Use a laminate repair kit containing colored filler sticks and a melting tool. Select stick closest to your floor color. Heat the tool per instructions. Melt filler into the scratch, slightly overfilling. Scrape excess level with the tool’s edge once cooled. Buff gently. Reality check: Color matching is challenging. Kits work best for small, isolated scratches in low-traffic areas. For scratches longer than 2 inches or in high-visibility zones, plank replacement is often more aesthetically successful.
– Prevention Emphasis: Laminate is highly scratch-resistant but not scratch-proof. Use felt pads under all furniture legs. Place walk-off mats at exterior doors. Avoid rubber-backed rugs (can stain laminate); use non-slip pads designed for hard surfaces.
Luxury Vinyl Plank (LVP) and Sheet Vinyl:
– Scuffs (rubber marks, shoe marks): Rub gently with a standard pencil eraser. For stubborn marks, use a melamine foam “magic eraser” dampened slightly with water. Rub lightly in small circles. Wipe clean. Critical caution: Test in hidden area first—aggressive rubbing can dull the wear layer finish. Never use abrasive cleaners or steel wool.
– Scratches: For surface scratches, apply a clear vinyl floor repair adhesive with toothpick. Let cure. For deeper scratches exposing the printed layer, use a vinyl repair kit with tinted filler. Match color carefully. Apply minimally. Advanced repair: For significant damage on LVP, cut out the damaged section using a utility knife guided by a straightedge. Cut a matching patch from a leftover plank (or inconspicuous area like under appliances). Apply vinyl flooring adhesive to subfloor. Press patch firmly. Seam may be visible but functional. Sheet vinyl repairs require heat welding—a professional technique.
– Critical Note: Avoid steam mops on vinyl floors. Excessive heat and moisture can warp planks, loosen adhesive, and damage the wear layer. Use only damp mopping with pH-neutral cleaners.
Tile and Stone Floors
Glazed Ceramic/Porcelain Tile:
– Surface Scratches on Glaze: Unfortunately, scratches on the fired glaze layer are permanent. Options are limited: 1) Use a porcelain repair kit (paint-like epoxy with pigment) to fill and color-match—best for small chips, less effective for linear scratches; 2) Replace the tile; 3) Accept as character (many historic tiles show wear proudly). Prevention is paramount: Use soft casters on chairs, felt pads under furniture legs, and area rugs in high-traffic paths.
– Unglazed Tile (Quarry, Saltillo) and Natural Stone (Slate, Travertine): Light scratches can often be honed out. Use a fine-grit (400+ grit) wet/dry sandpaper with water lubrication. Rub gently in small circles over the scratch. Rinse frequently. For deeper scratches, use progressively finer grits (600, then 1000). After honing, reseal the stone per manufacturer instructions. Professional recommendation: For valuable stone floors (marble, limestone), consult a stone restoration specialist—improper honing can create uneven surfaces.
Grout Scratches and Stains: Scratches in grout are typically cleaned, not repaired. Use a grout cleaner and stiff nylon brush. For stained grout that cleaning won’t fix, apply grout colorant (epoxy-based) after thorough cleaning and drying. This seals and recolors simultaneously.
The Comprehensive Scratch Prevention System
Prevention is always more effective and economical than repair. Integrate these evidence-based habits:
– Entryway Defense: Place heavy-duty, absorbent mats (minimum 3 ft x 5 ft) at every exterior door. Implement a shoe-removal protocol indoors. Use a mudroom station for wet/muddy footwear.
– Furniture Intelligence: Use wide, non-staining felt pads under all furniture legs (chairs, tables, sofas). Replace pads annually as they compress. For heavy items (pianos, cabinets), use furniture coasters with wide surface area to distribute weight. Critical detail: Ensure pads are securely attached—loose pads slide and cause new scratches.
– Pet Management Protocol: Trim pet nails every 2–3 weeks. Place durable, washable area rugs in high-traffic pet paths. Consider pet nail caps (soft plastic covers) for dogs prone to scratching. Clean up accidents immediately with enzymatic cleaners to prevent finish damage.
– Cleaning Discipline: Sweep or vacuum (with hard-surface attachment) daily to remove abrasive grit. Damp mop weekly with manufacturer-approved cleaner. Avoid vinegar, ammonia, or abrasive cleaners on finished wood or stone—they degrade finishes over time. Use pH-neutral cleaners for stone and vinyl.
– Environmental Control: Maintain stable humidity (35–55%) to prevent wood floor gaps where grit accumulates. Use UV-blocking window film in sun-drenched rooms to prevent finish degradation that increases scratch susceptibility.
Dents and Gouges: Restoring Contour and Structural Integrity
Dents (compressed material where fibers are displaced but not removed) and gouges (material physically removed, creating a void) require fundamentally different approaches. Misidentifying the damage type leads to failed repairs.
Wood Floor Dent Repair: The Controlled Steam Method
Effective for dents where wood fibers are compressed but the surface finish remains largely intact (e.g., from a dropped tool, high heel, or toy). Does not work on finishes that block moisture penetration (thick polyurethane) or engineered wood with very thin veneers (<2mm).
Step-by-Step Steam Restoration:
1. Clean and Prepare: Remove all dirt/debris from the dent. Lightly dampen a pure white cotton cloth (terrycloth works well)—it should feel damp, not dripping wet. Critical: Use white cloth to avoid dye transfer.
2. Apply Moisture and Heat: Place the damp cloth directly over the dent. Set a standard clothing iron to medium heat (NO steam setting). Press the iron firmly onto the cloth for 10–15 seconds. Lift, check progress. Repeat 3–5 times. Why it works: Moisture penetrates microscopic cracks in the finish. Heat activates the wood’s natural lignin, allowing compressed cellulose fibers to re-expand. You may observe the dent rising gradually during the process.
3. Dry and Assess: Remove cloth. Allow area to dry completely for 24 hours. If dent remains partially visible, repeat process once. Once fully raised, lightly sand only the immediate area with 220-grit sandpaper to smooth any raised wood fibers. Wipe clean. Apply finish to match surrounding area (as detailed in deep scratch repair).
4. When to Stop: If no improvement after two attempts, the dent is too deep, the finish is too impermeable, or the wood species doesn’t respond well. Proceed to gouge repair methods below.
Safety and Caution Notes:
– Never apply iron directly to floor—always use cloth barrier.
– Test process on scrap wood or hidden area first.
– Avoid excessive moisture—water rings or white haze indicate too much water. If this occurs, stop immediately; white haze may clear as it dries, or require light sanding.
– Not recommended for prefinished floors with aluminum oxide finish—moisture cannot penetrate effectively. Consult manufacturer first.
Gouge Repair: Filling the Void with Precision
Required when material is missing, creating a visible hole or groove (e.g., from dragged furniture, pet claws, or impact damage).
Step 1: Clean and Prepare the Cavity
– Remove all loose splinters, dust, and debris using a dental pick, stiff brush, or compressed air.
– Lightly sand the edges of the gouge with 120-grit sandpaper to “feather” the edges—this creates a tapered surface for filler adhesion and reduces visible ridges after filling. Vacuum thoroughly. Wipe with tack cloth.
Step 2: Select the Optimal Filler Based on Floor Type and Finish
– Stainable Wood Filler (Best for Unfinished or Site-Finished Floors): Water-based or solvent-based putty that accepts stain. Mix small batch to match wood color (add universal tint or wood dust from sanding). Apply with plastic putty knife, pressing firmly to eliminate air pockets. Overfill slightly (1/16 inch) to account for shrinkage. Top brands: Minwax High-Performance Wood Filler, Timbermate.
– Epoxy-Based Filler (Best for Deep Gouges, High-Moisture Areas, or Structural Integrity): Two-part epoxy (resin + hardener) mixed with wood dust collected from sanding your floor. Creates an extremely hard, durable, water-resistant repair. Tint with universal colorant or wood dust for better match. Ideal for bathroom edges, kitchen high-traffic zones, or deep gouges near seams. Top brands: Abatron WoodEpox, System Three T-88.
– Burn-In Stick (Professional Choice for Prefinished Floors): Hard wax stick melted into the gouge with a specialized heated knife. Requires skill but offers excellent color matching and seamless finish. Best for small gouges on prefinished floors where sanding isn’t feasible. Learning curve: Practice extensively on scrap wood first.
– Laminate/Vinyl Specific Fillers: Use repair kits designed for the material—colored putties that mimic the wear layer. Accept that perfect matching is difficult; focus on functional repair.
Step 3: Cure, Shape, and Finish
– Allow filler to cure completely per product instructions (water-based: 1–2 hours; epoxy: 4–24 hours).
– Sand cured filler flush with surrounding floor using 120-grit, then 220-grit sandpaper. Sand with the wood grain. Feather edges meticulously.
– For wood floors: Stain to match (if applicable), then apply 2–3 thin coats of finish, feathering beyond repair area. Buff final coat lightly.
– Critical quality check: Run your fingernail over the repair. It should feel perfectly smooth with no ridge or depression. If not, apply thin additional filler coat or sand further.
Advanced Technique: The Dutchman Repair for Significant Damage
For large gouges, cracks, or damaged sections in visible areas where filler won’t suffice:
1. Template Creation: Cut a small patch (1″ x 2″ typical) from matching scrap wood. Shape edges with file to create unique “puzzle piece” shape—this prevents rotation and improves adhesion.
2. Routing the Cavity: Using a plunge router with straight bit, carefully rout out the damaged area to match the template depth (typically 1/8″–1/4″). Safety: Wear respirator; secure work area. Practice routing on scrap first.
3. Fit and Glue: Test-fit the patch. It should sit flush. Apply wood glue to cavity and patch. Tap gently into place with rubber mallet. Clamp if possible. Wipe excess glue immediately.
4. Finish: Once dry, sand flush. Stain and finish to match. This technique is used by conservation professionals for historic floor repairs—it’s durable and visually discreet when executed well. Recommendation: Attempt only if you have routing experience; otherwise, consult a professional woodworker.
Non-Wood Floor Gouge Repair Summary
- Laminate: For small gouges, use colored filler from repair kit. For large damage, plank replacement is superior. Attempting deep fills often looks worse than the original damage.
- Luxury Vinyl Plank (LVP): Cut out damaged section with utility knife. Glue in patch from leftover plank. Seam visibility depends on pattern randomness. For sheet vinyl, professional heat welding is required for invisible repair.
- Tile: Small chips can be filled with epoxy repair kit tinted to match. Large damage requires tile replacement. Never attempt to fill cracks across entire tiles—this indicates substrate failure.
Gaps and Buckling: Addressing Seasonal Movement and Moisture Imbalance
Gaps between boards and buckling (boards lifting off subfloor) are primarily moisture-driven phenomena. Understanding normal seasonal behavior versus problematic movement is essential to avoid unnecessary repairs.
Seasonal Gaps in Solid Wood Floors: Normal Physiology vs. Pathology
Normal Seasonal Gaps:
– Appearance: Thin gaps (up to 1/16 inch wide) appearing uniformly between boards during winter months (low humidity), closing completely during summer (high humidity).
– Cause: Natural hygroscopic response of wood to ambient humidity changes. A 5-inch-wide oak board can shrink approximately 1/32 inch per 10% drop in relative humidity.
– Action Required: None. This is expected behavior for solid wood floors. Preventative measure: Maintain indoor relative humidity between 35% and 55% year-round using humidifiers (winter) and dehumidifiers (summer). Monitor with a calibrated hygrometer placed near the floor. This minimizes gap width fluctuation and reduces stress on the floor system.
Problematic Gaps:
– Appearance: Gaps wider than 1/8 inch, gaps that persist year-round (do not close in humid months), gaps concentrated in specific areas (not uniform), or gaps accompanied by cupping (edges of boards raised higher than center).
– Potential Causes:
– Excessive moisture loss (prolonged humidity below 30%)
– Subfloor issues (uneven subfloor causing board separation)
– Improper installation (boards installed too tightly without expansion space)
– Water damage history causing permanent board shrinkage
– Repair Protocol:
– Wood Sliver Inlay: For gaps 1/16″–1/8″ wide. Cut thin slivers from matching scrap wood (use utility knife or razor blade). Apply wood glue to sliver. Tap gently into gap with rubber mallet. Wipe excess glue. Once dry, sand flush. Stain and finish to match. Pro tip: Cut slivers slightly tapered for easier insertion.
– Sawdust and Binder Paste: Mix fine sanding dust from your floor with wood glue to form a thick paste. Press firmly into gap with putty knife. Overfill slightly. Once dry, sand flush. Best for narrow, irregular gaps. Color matches perfectly since it uses your floor’s own wood.
– Professional Screening and Recoating: For multiple small gaps across a room. A floor professional lightly sands (screens) the entire surface to open the wood pores, then applies a fresh coat of finish. The finish flows into micro-gaps, visually minimizing them. Not suitable for large gaps or floors with insufficient remaining wear layer.
Buckling and Cupping: Emergency Response Protocol
Buckling (boards lifting significantly off subfloor, creating ridges) is a moisture emergency. Cupping (concave board shape with edges raised) is the precursor to buckling. Both indicate moisture imbalance—usually excessive moisture under the floor or rapid humidity changes.
Immediate Action Steps (First 24 Hours):
1. Identify and Stop Moisture Source: Check for leaking appliances (dishwasher, refrigerator), plumbing leaks, roof leaks, or groundwater intrusion in basements. Shut off water supply if necessary. Remove standing water immediately with wet-dry vacuum.
2. Initiate Aggressive Drying:
– Place high-velocity fans blowing across the floor surface (not down onto it) to promote evaporation.
– Position dehumidifiers in the room and adjacent areas. Empty regularly or use continuous drain.
– Open windows only if outdoor humidity is lower than indoor humidity (check hygrometer).
– Critical: Do not cover wet areas with rugs or tarps—this traps moisture and accelerates damage.
3. Restrict Traffic: Place barriers to prevent walking on affected area. Weight exacerbates buckling and can cause permanent deformation.
4. Monitor Progress: Use a moisture meter daily to track moisture content in boards and subfloor. Target: 6–9% moisture content for wood floors. Document readings.
Post-Drying Assessment (After 72+ Hours of Drying):
– Minor Cupping: Boards may gradually flatten as moisture equalizes. Continue monitoring humidity. If cupping resolves within 2 weeks, no repair needed beyond humidity control.
– Persistent Cupping/Buckling: Boards that remain cupped or buckled after thorough drying have likely suffered permanent deformation. Options:
– Sanding and Refinishing: Only viable if floor has sufficient thickness (solid wood ≥ 5/8″ thick; engineered with veneer ≥ 2mm). Requires professional assessment. Sanding removes cupped edges but reduces overall floor thickness.
– Board Replacement: Remove and replace severely damaged boards. Best for localized buckling. Requires skill to match existing floor.
– Full Replacement: Necessary for widespread buckling where structural integrity is compromised. Consult certified flooring professional.
Prevention Strategies:
– Acclimation: Always acclimate new flooring in the installation environment for minimum 72 hours (per NWFA guidelines) before installation. Store planks flat, unboxed, in the room.
– Moisture Barriers: Install vapor barriers over concrete subfloors (6-mil polyethylene minimum). Use moisture-resistant underlayment for wood subfloors in humid climates.
– Expansion Gaps: Ensure proper expansion space at all walls and fixed objects (¼ inch minimum for wood floors; follow manufacturer specs for other materials). Never install flooring tight against walls.
– Humidity Management: Install whole-house humidifier/dehumidifier system controlled by a smart thermostat with humidity sensing. Set target range (35–55% RH) and monitor remotely via app.
Vinyl and Laminate Buckling: Causes and Correction
Common Causes:
– Insufficient expansion gap at walls (most frequent cause)
– Moisture intrusion under floor (leak, high subfloor moisture)
– Poor subfloor preparation (uneven surface causing stress points)
– Installation over unapproved substrates (e.g., cushioned vinyl over existing cushioned vinyl)
Repair Protocol:
1. Remove Baseboard Molding: Carefully pry off baseboard near buckled area using pry bar and wood shims to protect wall. Inspect expansion gap.
2. Verify and Restore Expansion Gap: Measure gap between plank edge and wall. If less than manufacturer’s specification (typically ¼ inch), the floor is compressed.
– For minor buckling: Carefully remove affected planks starting at the wall. Trim planks to restore proper gap. Reinstall planks, ensuring tight seam connections. Reattach baseboard with spacers to maintain gap.
– For severe buckling: May require removing multiple rows of planks to relieve pressure. Requires plank removal skill—practice on scrap first. Number planks during removal for reinstallation order.
3. Address Moisture Source: If moisture is present under floor, identify and fix leak. Dry subfloor thoroughly (use fans, dehumidifier). Replace any planks with swollen cores (laminate) or delaminated layers (LVP). Critical: Do not reinstall until subfloor moisture content is within manufacturer’s specification (typically <4% for concrete, <12% for wood subfloor—verify with moisture meter).
4. Subfloor Preparation: If buckling recurs after moisture/expansion fixes, subfloor may be uneven. Use self-leveling compound on concrete or sand high spots on wood subfloor before reinstalling flooring. Ensure flatness within 3/16 inch in 10 feet.
Water Damage: Emergency Response and Material-Specific Recovery
Water damage severity depends on three factors: floor material composition, duration of exposure, and speed of response. Minutes matter. This protocol prioritizes safety, structural integrity, and salvage potential.
The Universal Emergency Protocol: First 24 Hours
- Ensure Personal Safety First: Turn off electricity at the main breaker if standing water is near outlets, appliances, or light fixtures. Wear rubber-soled shoes. If sewage backup is involved (black water), evacuate and call professional remediation immediately—do not attempt DIY cleanup.
- Stop the Source: Shut off main water valve if leak is from plumbing. Place buckets under active leaks. Turn off appliance water supply lines (dishwasher, refrigerator).
- Extract Standing Water: Use wet-dry vacuum, sump pump, or absorbent towels/mops. Work from least damaged area toward source to avoid spreading contamination. Critical: For wood floors, avoid excessive wetting during cleanup—use damp (not soaking) towels.
- Initiate Drying Sequence:
- Remove area rugs, furniture, and baseboards from affected zone.
- Place high-velocity fans blowing across the floor surface to maximize evaporation.
- Position commercial-grade dehumidifiers in the room and adjacent areas. Empty frequently or use continuous drain hoses.
- Open interior doors to promote air circulation. Open windows only if outdoor humidity is lower than indoor humidity (verify with hygrometer).
- Do not use heaters to “speed drying”—excessive heat can warp materials and set stains.
- Monitor Relentlessly: Check moisture levels every 4–6 hours initially using a pinless moisture meter. Document readings. Target drying goals:
- Solid Wood Floors: 6–9% moisture content
- Engineered Wood: 6–10% (check manufacturer specs)
- Concrete Subfloor: <4% moisture vapor emission rate (MVER)
- Critical: Do not cover drying floor with rugs, plastic, or furniture—this traps moisture and promotes mold growth.
Material-Specific Recovery Pathways
Solid Hardwood Floors:
– Surface Spill (Quick Cleanup <15 mins): Usually no damage. Wipe immediately with dry cloth. Monitor for 24 hours for discoloration.
– Prolonged Exposure (Hours to Days):
– Discoloration: Light water stains may sand out during refinishing. Dark stains (caused by tannins reacting with water) often require oxalic acid (wood bleach) treatment before sanding. Test bleach in hidden area first. Severe staining may necessitate board replacement.
– Warping/Cupping: Follow buckling protocol above. After thorough drying (7+ days), assess if boards flatten. Minor cupping may resolve; severe warping requires sanding (if thickness allows) or replacement.
– Mold Concerns: If mold is visible under boards or in subfloor, stop. Wear N95 mask. Contact certified mold remediation professional. Do not disturb mold—spores become airborne. Safety is paramount.
Engineered Wood Floors:
– Thin veneer (typically 2–4mm) is highly vulnerable. Swelling often causes irreversible delamination between veneer and core.
– Assessment: After drying, check for veneer separation, bubbling, or permanent cupping.
– Repair Reality: Localized damage may allow plank replacement. Widespread damage usually requires full replacement. Contact manufacturer—some offer moisture warranties. Prevention insight: Engineered wood is more stable than solid wood in humid environments but less repairable when damaged.
Laminate Floors:
– Particleboard or HDF core swells rapidly when wet, causing irreversible delamination and edge swelling.
– Critical Protocol: Do not attempt to dry laminate in place. Once core is wet, damage is permanent.
– Action: Remove affected planks immediately after water extraction. Dry subfloor thoroughly. Replace damaged planks with new ones. Keep extra planks from original installation for repairs. Prevention: Install moisture barriers meticulously. Avoid wet mopping; use damp microfiber cloths only.
Luxury Vinyl Plank (LVP) and Sheet Vinyl:
– Water Resistance Clarification: LVP is water-resistant on the surface, but seams are vulnerable. Water can seep under planks, damaging subfloor or adhesive. Sheet vinyl is more seamless but vulnerable at edges and seams.
– Recovery: Lift affected planks carefully. Dry subfloor completely. Inspect adhesive—replace if compromised. Reinstall planks or replace damaged sections. For sheet vinyl, professional reseaming may be needed.
– Mold Check: Inspect subfloor thoroughly for mold before reinstallation. Treat with mold-inhibiting primer if needed.
Ceramic/Porcelain Tile and Stone:
– Tile Itself: Impervious to water damage.
– Critical Vulnerability: Grout is porous. Water penetrates grout lines, saturating the mortar bed and subfloor beneath.
– Protocol:
1. Remove standing water from tile surface.
2. Check for loose tiles (tap with screwdriver handle—hollow sound indicates detachment).
3. If water intrusion is suspected under tiles, do not regrout. Consult professional. They may need to remove tiles to dry subfloor and prevent mold growth in the mortar bed.
4. After subfloor is confirmed dry, reseat loose tiles with fresh thinset mortar. Regrout damaged areas.
– Stone Floors: Natural stone (marble, limestone) is porous and can stain permanently from water with minerals. Blot spills immediately. Seal stone floors annually with impregnating sealer.
When Replacement is the Only Responsible Choice
Replace boards, planks, or tiles if:
– Material is soft, crumbly, or shows signs of dry rot (wood)
– Laminate core is swollen or delaminated
– Vinyl adhesive has failed extensively across the area
– Tile substrate (backer board, mortar bed) is damaged or moldy
– Mold growth is present beneath flooring (requires professional remediation first)
– Floor has been submerged in contaminated water (sewage, floodwater)
Wood Floor Board Replacement Technique:
1. Remove Damaged Board: Set circular saw depth to exactly floorboard thickness (measure scrap first). Cut board lengthwise down the center, staying 1/8 inch away from tongue and groove edges to avoid damaging adjacent boards. Chisel out pieces carefully. Remove nails/screws from subfloor.
2. Prepare New Board: Remove the bottom lip of the groove side using a table saw or router to create a “slip tongue” profile. This allows the new board to slide into place without disassembling the entire floor.
3. Install New Board: Apply wood glue to the tongue of the adjacent board. Slide new board into place. Secure by face-nailing near the groove edge (countersink nails) or using a spline connector. For prefinished floors, use color-matched filler over nail holes.
4. Finish: Sand repair area lightly. Stain and finish to match. Pro tip: Keep 3–5 extra planks from original installation stored flat in a climate-controlled space for future repairs. Label with floor location and date.
Tile and Grout Damage: Cracks, Chips, and Loose Tiles
Tile damage often reflects underlying substrate issues. Addressing only the visible tile without evaluating the foundation leads to recurring problems.
Loose Tile Diagnosis and Repair Protocol
Diagnosis:
– Tap tile firmly with the handle of a screwdriver. A solid “click” indicates good adhesion. A hollow “thud” or drumming sound indicates detachment from the substrate.
– Press down on tile corners. Any movement or “spring” confirms looseness.
– Critical Investigation: Loose tiles rarely occur in isolation. Check surrounding tiles. Inspect grout lines for cracks. Look for signs of moisture damage on adjacent walls or baseboards. Loose tiles often indicate:
– Poor initial installation (insufficient thinset coverage)
– Subfloor movement or deflection (joists flexing)
– Moisture damage to substrate (rotted plywood, deteriorated backer board)
– Structural settling of the building
Repair Process:
1. Remove Loose Tile Safely:
– Protect surrounding tiles with painter’s tape.
– Drill a series of small holes (1/8 inch) along grout lines surrounding the loose tile using a masonry bit. This weakens the grout.
– Use an oscillating multi-tool with grout removal blade to carefully cut remaining grout. Alternative: Use a grout saw (manual tool) for small areas—less dust, more labor.
– Insert a thin putty knife or tile lifter under the tile edge. Gently pry upward. If tile breaks, remove fragments carefully. Safety: Wear safety glasses—tile shards can fly.
2. Prepare the Substrate:
– Scrape away all old thinset mortar and adhesive residue using a chisel or oscillating tool with scraper blade. Substrate must be clean, dry, and solid.
– Critical Inspection: Check substrate integrity. For wood subfloors: Probe with screwdriver—soft spots indicate rot. For concrete: Check for cracks or spalling. For backer board: Look for crumbling or water damage. If substrate is compromised, repair substrate first—this may require cutting out damaged section and replacing with new plywood or backer board. This step is non-negotiable for lasting repair.
– Clean area thoroughly with vacuum and damp cloth. Allow to dry completely.
3. Install New Tile:
– Dry-fit the replacement tile to ensure proper fit. Pro tip: Keep extra tiles from original installation. If unavailable, take a sample to tile store for matching—bring photo of installed tile for context.
– Mix thinset mortar to peanut butter consistency. Using a notched trowel (size per tile manufacturer specs), spread mortar on substrate and back-butter the tile.
– Press tile firmly into place with slight twisting motion. Use tile spacers to maintain consistent grout lines. Check level with adjacent tiles.
– Allow mortar to cure per manufacturer instructions (typically 24 hours) before grouting.
4. Grout and Seal:
– Mix grout to smooth consistency. Force into joints with grout float held at 45-degree angle. Wipe excess diagonally across tile surface.
– After grout haze appears (15–30 mins), clean tile surface with damp sponge, rinsing frequently. Avoid digging grout out of joints.
– Allow grout to cure 72 hours. Apply grout sealer to protect against stains and moisture penetration.
Cracked Tile Repair Options
Hairline Cracks (Non-Structural):
– Clean crack thoroughly with toothbrush and isopropyl alcohol. Allow to dry.
– Fill with clear, flexible epoxy adhesive using a toothpick. Wipe excess immediately. Once cured, apply grout sealer over the repair. Limitation: Repair is visible but prevents crack propagation. Best for low-traffic areas or temporary fix before replacement.
Large Cracks or Broken Tiles:
– Replacement is the only durable solution. Follow loose tile removal and replacement protocol above. Critical: If multiple tiles in an area are cracked, investigate underlying cause (subfloor deflection, impact damage) before reinstalling. Address root cause to prevent recurrence.
Grout Repair, Renewal, and Color Transformation
Cracked, Crumbling, or Stained Grout:
1. Remove Old Grout: Use oscillating tool with grout blade or manual grout saw to remove grout to a depth of at least 2/3 the tile thickness. Vacuum thoroughly to remove all dust—residual dust prevents new grout adhesion.
2. Clean and Dampen: Wipe tiles with damp sponge. Tiles should be damp (not wet) when grouting—this prevents premature moisture absorption from new grout.
3. Apply New Grout: Mix grout per instructions. Force into joints with float. Work in small sections (3 ft x 3 ft). Hold float at 45 degrees to pack joints completely. Remove excess grout diagonally across tiles.
4. Clean and Cure: After 15–20 minutes (when grout begins to haze), clean tiles with damp sponge, rinsing frequently. Change water often. Final polish with dry microfiber cloth after 2 hours. Allow full cure (72 hours) before sealing.
Grout Color Change (Without Re-grouting):
– Use epoxy-based grout colorant. Prerequisite: Grout must be clean, dry, and free of sealers or waxes (strip with grout cleaner if needed).
– Apply colorant with small artist’s brush, working it deeply into grout lines. Wipe excess from tile surfaces immediately with damp cloth.
– Apply second coat after first coat dries (2–4 hours). Multiple thin coats yield better coverage than one thick coat.
– Allow to cure 72 hours. Benefit: Colorant seals grout simultaneously, providing stain resistance. Ideal for updating outdated grout colors (e.g., changing pink grout to charcoal).
Tool and Material Mastery: Building Your Strategic Floor Repair Kit
A thoughtfully curated toolkit prevents project delays, reduces frustration, and ensures repairs are executed safely and effectively. Organize tools by repair category. Invest in quality for frequently used items; budget options suffice for occasional use.
Essential Tools Checklist: Must-Haves Organized by Function
| Category | Core Tools (Non-Negotiable) | Budget-Conscious Alternatives | Professional Upgrades |
|---|---|---|---|
| Diagnosis | Digital moisture meter (pinless), stud finder with AC detection, digital hygrometer/thermometer | Smartphone hygrometer app (less accurate), manual stud finder | Professional moisture meter with species calibration, thermal imaging camera for hidden moisture |
| Squeak Repair | Cordless drill/driver, depth stop collar, countersink bit set, wood screws (assorted lengths), cedar shims | Hand screwdriver, finishing nails, cardboard shims (temporary) | Squeak-relief screw kit (pre-measured screws, break-off heads, plugs), joist finder attachment |
| Scratch/Dent Repair | Sandpaper (120, 180, 220 grit), putty knives (1.5″, 3″), microfiber cloths, detail sander | Nail file, candle wax, cotton swabs | Random orbital sander (for larger areas), burn-in knife set with heat control, color-matching system |
| Tile/Grout Repair | Grout saw (manual), oscillating multi-tool with grout blade & scraper, tile nippers, notched trowel | Utility knife, flathead screwdriver (carefully), putty knife | Wet tile saw (for precise cuts), grout removal bit for drill, laser level |
| Safety & Prep | ANSI-approved safety glasses, N95 respirator mask, knee pads, work gloves, shop vacuum with HEPA filter | Basic safety glasses, dust mask (less protection) | Powered air-purifying respirator (PAPR), hearing protection, task lighting |
Material Selection Guide: Choosing the Right Product for the Job
Wood Fillers: Understanding the Chemistry
– Water-Based Fillers (e.g., Minwax High-Performance): Easy water cleanup, low odor, stainable. Ideal for indoor use, unfinished floors. Cure time: 1–2 hours. Best for: DIYers, small repairs, homes with children/pets (low VOC).
– Solvent-Based Fillers (e.g., Famowood): Stronger bond, faster initial set, sands harder. Requires mineral spirits cleanup. Higher VOCs—use with ventilation. Best for: High-traffic areas, structural fills, experienced users.
– Epoxy Fillers (e.g., Abatron WoodEpox): Two-part system. Extremely durable, waterproof, bonds to damp wood. Can be tinted with wood dust. Cure time: 4–24 hours. Best for: Bathrooms, kitchens, deep gouges, historic restoration. Higher cost justified for critical repairs.
Adhesives: Matching Chemistry to Application
– PVA Wood Glue (e.g., Titebond II): Water-resistant, strong wood-to-wood bond. Requires clamping pressure. Cleanup with water before cure. Use for: Loose board repairs, Dutchman patches, wood sliver inlays.
– Construction Adhesive (e.g., Liquid Nails FuzeIt): High-strength, gap-filling, bonds wood to concrete/metal. No clamping needed. Solvent cleanup. Use for: Subfloor shimming, securing loose tiles to substrate, glue blocks for squeaks.
– Epoxy Adhesive (e.g., J-B Weld Wood Restore): Two-part structural adhesive. Waterproof, fills gaps, bonds dissimilar materials. Use for: Critical structural repairs, water-damaged areas, bonding filler to difficult substrates.
– Specialty Adhesives: Laminate repair adhesive (cyanoacrylate-based), vinyl flooring adhesive (pressure-sensitive), tile thinset mortar (cement-based). Always* use manufacturer-recommended adhesive for the specific material.
Finishes: Preserving and Protecting
– Water-Based Polyurethane: Clear finish, low odor, fast dry time (2–4 hours between coats), low VOC. Resists yellowing. Best for: Light-colored woods, homes with sensitivities, quick turnaround repairs.
– Oil-Based Polyurethane: Amber tone (enhances warm woods), extremely durable, longer dry time (8–24 hours), higher VOC. Best for: Traditional looks, high-wear areas, compatibility with existing oil-finished floors.
– Hardwax Oils (e.g., Osmo, Rubio Monocoat): Penetrating finish, repairs easily spot-treated, natural matte look. Requires more frequent maintenance. Best for: European oak, reclaimed wood, eco-conscious users. Critical: Never mix finish types on the same floor—test compatibility first.
Storage and Organization Protocol
– Store repair materials in a dedicated, labeled plastic tote with compartments. Include:
– Small containers of wood filler (multiple colors)
– Wax sticks/stain markers (light, medium, dark)
– Assorted wood screws, shims, sandpaper
– Sample of your floor (scrap piece with finish)
– Written notes: Floor type, finish type, stain color name, installation date
– Keep in climate-controlled area (not garage or attic where temperature extremes degrade materials).
– Replenish after each use. A ready kit turns minor issues into 15-minute fixes instead of weekend projects.
Prevention: The Invisible Repair Strategy
The most successful floor repairs are those never needed. Prevention is a systematic practice, not a one-time task. Integrate these evidence-based protocols into your home maintenance rhythm.
Humidity Management: The Single Most Impactful Habit
- Monitor Relentlessly: Place digital hygrometers in rooms with wood floors. Check readings weekly. Ideal range: 35–55% relative humidity year-round.
- Winter Protocol (Humidity <35%): Use whole-house humidifier attached to HVAC system (ideal) or portable humidifiers in key rooms. Refill daily. Clean tanks weekly to prevent mold.
- Summer Protocol (Humidity >55%): Run air conditioning (dehumidifies as it cools). Use standalone dehumidifiers in basements, crawlspaces, or humid climates. Empty regularly or use continuous drain.
- Smart Integration: Install smart thermostat with humidity sensing (e.g., Ecobee, Nest). Set automatic triggers: humidifier activates below 38%, dehumidifier above 52%. Receive alerts on phone if levels go out of range.
Furniture and Traffic Management System
- Furniture Pads Protocol:
- Use wide, non-staining felt pads under all furniture legs (chairs, tables, sofas, beds).
- Replace pads annually—they compress and lose effectiveness.
- For heavy items (pianos, cabinets), use furniture coasters with wide surface area (minimum 4″ diameter) to distribute weight.
- Critical detail: Ensure pads are securely attached with strong adhesive. Loose pads slide and cause new scratches.
- Chair Casters Upgrade: Replace hard plastic casters on office/dining chairs with soft polyurethane casters rated for hard surfaces. Look for “hardwood floor safe” labeling. Avoid rubber casters—they can leave marks.
- Area Rug Strategy:
- Place durable, low-pile rugs (wool, polypropylene) in high-traffic pathways (hallways, between sofa and coffee table).
- Use rug pads designed for hard surfaces (felt or rubber mesh) to prevent slipping and absorb impact.
- Rotate rugs annually to prevent uneven fading or wear patterns on underlying floor.
- Entryway Defense System:
- Install heavy-duty, absorbent mats (minimum 3 ft x 5 ft) at every exterior door.
- Implement a “shoe-free” policy indoors. Provide indoor slippers or clean footwear.
- Place a small bench near entry for easy shoe removal. Keep a brush nearby to clean pet paws after outdoor time.
Cleaning Discipline: Daily, Weekly, Seasonal Routines
- Daily: Sweep or vacuum (with hard-surface attachment) high-traffic areas to remove abrasive grit. Focus on entryways, kitchens, hallways.
- Weekly:
- Wood/Laminate/LVP: Damp mop with manufacturer-approved cleaner and microfiber mop. Wring mop thoroughly—floor should be damp, not wet. Avoid steam mops on wood or laminate.
- Tile/Stone: Sweep, then mop with pH-neutral cleaner. Avoid vinegar or acidic cleaners on natural stone—they etch the surface.
- Grout: Scrub grout lines monthly with stiff nylon brush and grout cleaner. Rinse thoroughly.
- Seasonal:
- Inspect floors for emerging issues (new squeaks, small gaps, loose tiles). Address minor problems immediately.
- Reapply felt pads to furniture legs.
- Check and clean humidifier/dehumidifier filters.
- For wood floors: Apply maintenance coat of polish if recommended by manufacturer (typically every 6–12 months in high-traffic areas).
Pet and Child Zone Protection
- Pet Nail Maintenance: Trim pet nails every 2–3 weeks. Consult groomer or vet for technique. Short nails cause significantly less scratching.
- Designated Play Areas: Place durable, washable area rugs in children’s play zones or pet resting areas. Use rugs with non-slip backing.
- Accident Protocol: Blot pet accidents immediately with paper towels. Clean with enzymatic cleaner designed for hard surfaces (e.g., Nature’s Miracle). Never use ammonia-based cleaners—they attract pets back to the same spot. For urine stains on wood, sanding may be required after thorough cleaning; deep stains often necessitate board replacement.
Seasonal Floor Inspection Checklist (Twice Yearly)
Perform this 20-minute inspection every spring and fall:
– [ ] Walk slowly through each room, listening for new squeaks or creaks
– [ ] Visually inspect for new scratches, dents, or gaps (use fingernail test on suspicious areas)
– [ ] Check baseboards for gaps indicating floor movement
– [ ] Tap tile floors with screwdriver handle to detect hollow spots
– [ ] Verify humidity levels are within target range (35–55%)
– [ ] Inspect area rugs and pads for wear; replace if compressed or frayed
– [ ] Tighten loose furniture pads; replace missing ones
– [ ] Note any issues in your home maintenance log for timely repair
When to Call a Professional: Recognizing the Limits of DIY
DIY floor repair builds valuable skills and saves money, but knowing when to engage experts protects your safety, your home’s value, and your peace of mind. Seek professional assistance when:
- Structural Concerns Are Present: Significant floor sagging (more than 1/8 inch over 10 feet), pronounced bouncing when walked on, visible cracks in ceiling below, or doors/windows sticking suddenly. These may indicate joist failure, foundation issues, or serious water damage requiring structural engineering evaluation.
- Extensive Water Damage Occurs: Flooding affecting more than 10 square feet of flooring, sewage backup (Category 3 water), or water intrusion of unknown duration. Certified water damage restoration professionals have industrial-grade drying equipment and mold remediation protocols.
- Mold Growth is Visible or Suspected: Mold beneath flooring, in subfloor, or on structural elements requires containment and remediation by IICRC-certified professionals. Disturbing mold without proper containment spreads spores.
- Historic or Valuable Floors Are Damaged: Original hardwood in pre-1940 homes, rare wood species, parquet patterns, or floors with significant sentimental/historical value warrant consultation with a certified wood flooring inspector (NWFA-certified) or historic preservation specialist. Improper repairs can destroy irreplaceable character.
- Warranty Considerations Apply: If flooring is under manufacturer warranty, DIY repairs may void coverage. Contact manufacturer first for approved repair protocols or authorized technicians.
- Skill or Tool Limitations Exist: Board replacement requiring router work, tile substrate repair, or large-area refinishing demands specialized skills and equipment. Attempting beyond your capability risks costly mistakes. Renting tools doesn’t replace experience.
- Health or Physical Constraints Apply: Sanding generates fine dust requiring respirator use. Heavy lifting, prolonged kneeling, or working in confined crawlspaces may not be advisable based on individual health. Prioritize personal safety.
How to Select a Qualified Professional
- Verify Credentials: For wood floors, seek NWFA (National Wood Flooring Association) certified installers or inspectors. For tile, look for CTI (Certified Tile Installer) certification. Check state licensing requirements for contractors.
- Request Documentation: Ask for proof of insurance (liability and workers’ compensation), business license, and references from recent similar projects.
- Get Detailed Quotes: Obtain at least three written estimates. Quotes should specify materials, methods, timeline, and cleanup procedures. Beware of unusually low bids—they may cut corners.
- Check Reviews Critically: Read reviews on Google, BBB, and industry-specific sites. Look for patterns in feedback (communication, cleanup, punctuality). Request to see photos of past work.
- Ask Key Questions:
- “How will you diagnose the root cause, not just fix the symptom?”
- “What is your process for protecting my home during work?”
- “Do you offer a warranty on labor and materials?”
- “Can you provide references from clients with similar floor issues?”
Your Questions, Answered
Q: Can I fix a squeaky floor without removing the carpet?
A: Yes, with specialized techniques. Locate the joist beneath the squeak using a deep-scan stud finder. Drive a specialized screw (like a Squeak-Relief screw) designed to break off below the carpet pile through the carpet and padding into the joist. Test in an inconspicuous area first to ensure no visible damage to carpet backing. For widespread squeaks, consider having carpet professionally stretched and re-tacked—a carpet installer can often address subfloor issues during this process.
Q: How do I remove scuff marks from vinyl or laminate flooring?
A: Start gently: Rub with a standard pencil eraser. For stubborn marks, use a melamine foam “magic eraser” slightly dampened with water. Rub lightly in small circles. Wipe clean with damp cloth. Critical caution: Always test in a hidden area first—aggressive rubbing can dull the wear layer finish. Avoid abrasive cleaners, steel wool, or undiluted vinegar, which can damage the surface.
Q: My hardwood floor has black water stains. Can they be removed?
A: Surface-level stains may respond to oxalic acid (wood bleach). For deep stains penetrating the wood:
1. Sand the area carefully (only if floor has sufficient thickness—typically solid wood ≥ 5/8″ thick).
2. Apply oxalic acid crystals dissolved in warm water per package instructions.
3. Rinse thoroughly.
4. Neutralize with baking soda solution.
5. Sand again lightly once dry.
6. Stain and finish to match. Important: Test bleach in hidden area first. For engineered wood with thin veneer, sanding risks sanding through to the core—board replacement is often safer. Severe staining may require professional assessment.
Q: Why do gaps appear in my wood floor every winter?
A: This is normal hygroscopic behavior of wood. As indoor humidity drops in winter (often below 30% with heating systems), wood boards lose moisture and shrink, creating small gaps. Gaps typically close when humidity rises in summer. Action: Maintain indoor humidity between 35–55% year-round using a humidifier in winter. Gaps wider than 1/8 inch or persistent year-round warrant investigation for underlying issues like subfloor problems or excessive moisture loss.
Q: Can I use standard wood filler on laminate flooring?
A: No. Standard wood filler will not adhere properly to laminate’s melamine surface and won’t match the photographic layer. Use a laminate-specific repair kit containing colored filler sticks designed for the wear layer. These kits include fillers that mimic the wear layer and come in various colors. However, perfect color matching is challenging. For best results, test the filler in an inconspicuous area first. For large or highly visible damage, plank replacement is often more effective.
Q: How long does wood filler take to dry before sanding?
A: Drying time varies by product and environmental conditions. Water-based fillers